PCF PAS Ops Manager NSX-T Error connecting to NSX IP
1. Error connecting to NSX IP: The NSX server’s certificate is not signed with the provided NSX CA cert.
2.You will need a linux machine to create an AD cert and sign it.
Create the following folders.
mkdir cnf
mkdir certs
mkdir private
touch cnf/ca.cnf
nano cnf/ca.cnf
[root@pks-kube02 ~]# cat cnf/ca.cnf
[ ca ]
default_ca = CA_default
[ CA_default ]
# Directory and file locations.
dir = ./
certs = /certs
crl_dir = /crl
new_certs_dir = /certs
database = /index.txt
serial = /serial
RANDFILE = /private/.rand
# The root key and root certificate.
private_key = /private/ca.key.pem
certificate = /certs/ca.crt.pem
# For certificate revocation lists.
crlnumber = /crlnumber
crl = /crl/intermediate.crl.pem
crl_extensions = crl_ext
default_crl_days = 360
# SHA-1 is deprecated, so use SHA-2 or SHA-3 instead.
default_md = sha384
name_opt = ca_default
cert_opt = ca_default
default_days = 3650
preserve = no
policy = policy_strict
[ policy_strict ]
# The root CA should only sign intermediate certificates that match.
# See the POLICY FORMAT section of ‘man ca’.
countryName = match
stateOrProvinceName = match
organizationName = match
organizationalUnitName = optional
commonName = supplied
emailAddress = optional
[ policy_loose ]
# Allow the intermediate CA to sign a more diverse range of certificates.
# See the POLICY FORMAT section of the ‘ca’ man page.
countryName = optional
stateOrProvinceName = optional
localityName = optional
organizationName = optional
organizationalUnitName = optional
commonName = supplied
emailAddress = optional
[ req ]
# Options for the ‘req’ tool (‘man req’).
default_bits = 2048
distinguished_name = req_distinguished_name
string_mask = utf8only
# SHA-1 is deprecated, so use SHA-2 or SHA-3 instead.
default_md = sha256
# Extension to add when the -x509 option is used.
x509_extensions = v3_ca
[ req_distinguished_name ]
countryName = Country Name (2 letter code)
stateOrProvinceName = State or Province Name
localityName = Locality Name
0.organizationName = Organization Name
organizationalUnitName = Organizational Unit Name
commonName = Common Name
emailAddress = Email Address
# Optionally, specify some defaults.
countryName_default = SG
stateOrProvinceName_default = Singapore
localityName_default = Singapore
0.organizationName_default = Acepod Inc.
organizationalUnitName_default = Acepod Root CA
emailAddress_default = email@acepod.com
[ v3_ca ]
# Extensions for a typical CA (‘man x509v3_config’).
subjectKeyIdentifier = hash
authorityKeyIdentifier = keyid:always,issuer
basicConstraints = critical, CA:true
keyUsage = critical, digitalSignature, cRLSign, keyCertSign
[ v3_intermediate_ca ]
# Extensions for a typical intermediate CA (‘man x509v3_config’).
subjectKeyIdentifier = hash
authorityKeyIdentifier = keyid:always,issuer
basicConstraints = critical, CA:true, pathlen:0
keyUsage = critical, digitalSignature, cRLSign, keyCertSign
crlDistributionPoints = @crl_info
authorityInfoAccess = @ocsp_info
[ usr_cert ]
# Extensions for client certificates (‘man x509v3_config’).
basicConstraints = CA:FALSE
nsCertType = client, email
nsComment = “OpenSSL Generated Client Certificate”
subjectKeyIdentifier = hash
authorityKeyIdentifier = keyid,issuer
keyUsage = critical, nonRepudiation, digitalSignature, keyEncipherment
extendedKeyUsage = clientAuth, emailProtection
[ server_cert ]
# Extensions for server certificates (‘man x509v3_config’).
basicConstraints = CA:FALSE
nsCertType = server
nsComment = “Pivotal Generated Server Certificate”
subjectKeyIdentifier = hash
authorityKeyIdentifier = keyid,issuer:always
keyUsage = critical, digitalSignature, keyEncipherment
extendedKeyUsage = serverAuth
#crlDistributionPoints = @crl_info
#authorityInfoAccess = @ocsp_info
subjectAltName = @alt_names
[alt_names]
DNS.0 = *.acepod.com
[ crl_ext ]
# Extension for CRLs (‘man x509v3_config’).
authorityKeyIdentifier=keyid:always
[ ocsp ]
# Extension for OCSP signing certificates (‘man ocsp’).
basicConstraints = CA:FALSE
subjectKeyIdentifier = hash
authorityKeyIdentifier = keyid,issuer
keyUsage = critical, digitalSignature
extendedKeyUsage = critical, OCSPSigning
#[crl_info]
#URI.0 = http://crl.grilledcheese.us/whomovedmycheese.crl
#[ocsp_info]
#caIssuers;URI.0 = http://ocsp.grilledcheese.us/cheddarcheeseroot.crt
#OCSP;URI.0 = http://ocsp.grilledcheese.us/
3. Create the Private key and place under private/ca.key.pem
openssl ecparam -genkey -name secp384r1 | openssl ec -aes256 -out private/ca.key.pem
4. Create the CA cert.
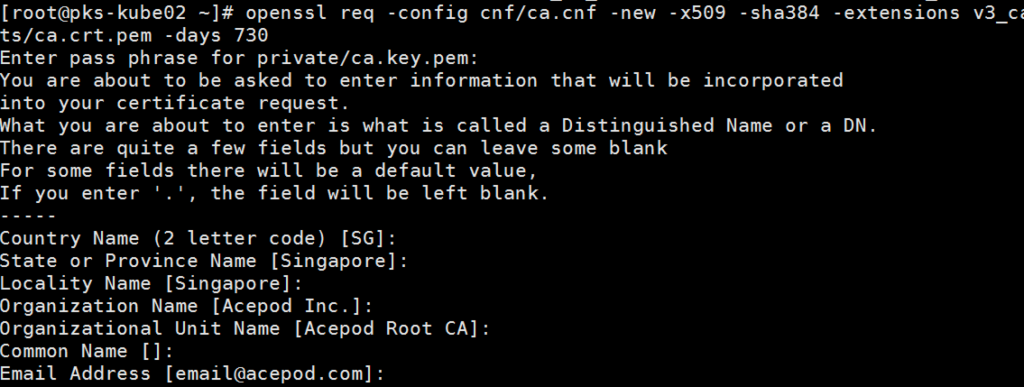
openssl req -config cnf/ca.cnf -new -x509 -sha384 -extensions v3_ca -key private/ca.key.pem -out certs/ca.crt.pem -days 730
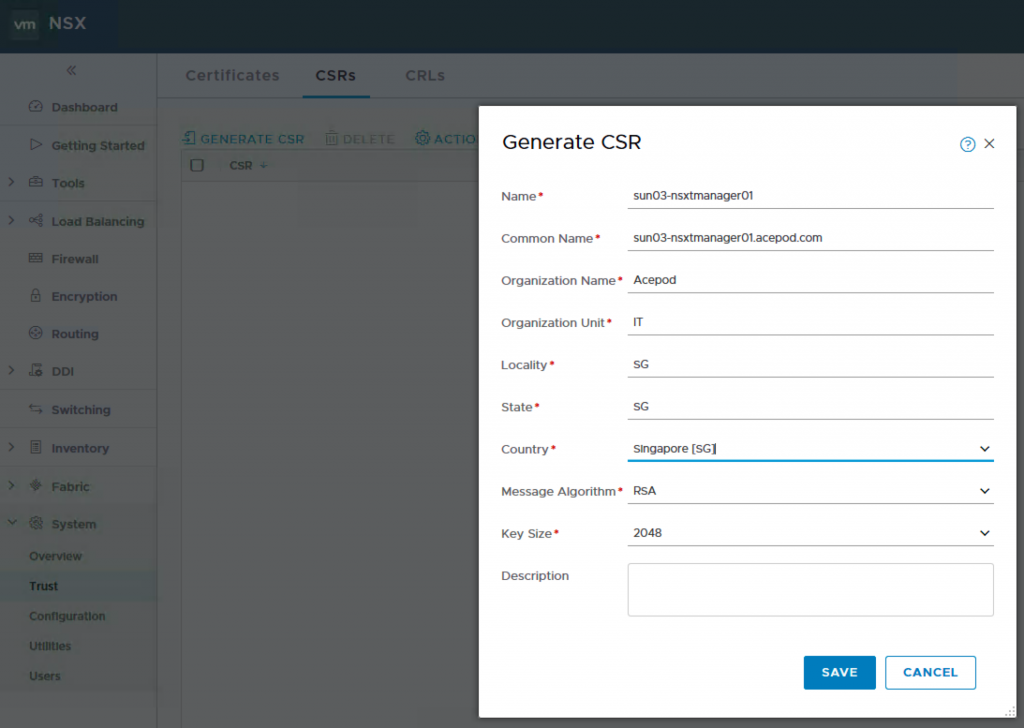
5. At NSX-T Manager, you generate a CSR.
6. After that you download the CSR PEM you just generated to the linux machine and put the file into the csr folder. I rename the file to nsxt9.csr.pem.
7. Sign the CSR with the AD cert you previously created.
openssl x509 -req -in csr/nsxt9.csr.pem -CA certs/ca.crt.pem -CAkey private/ca.key.pem -CAcreateserial -out certs/nsx-t.crt.pem -days 730
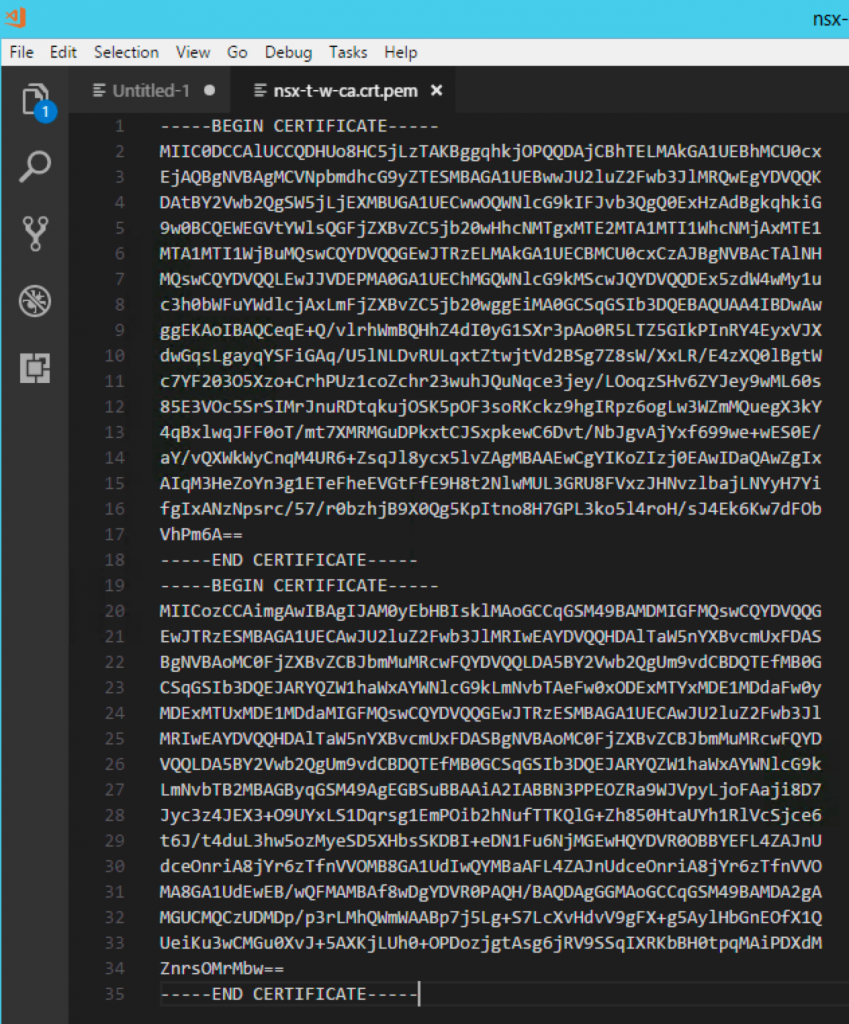
8. Open an editor and concat the nsx-t.crt.pem file and ca.crt.pem together. I then save it as nsx-t-w-ca.crt.
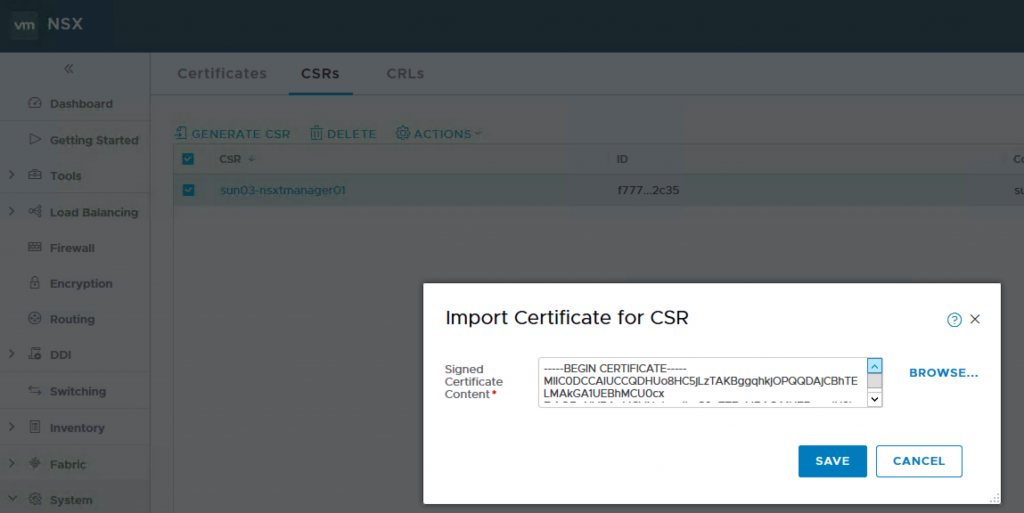
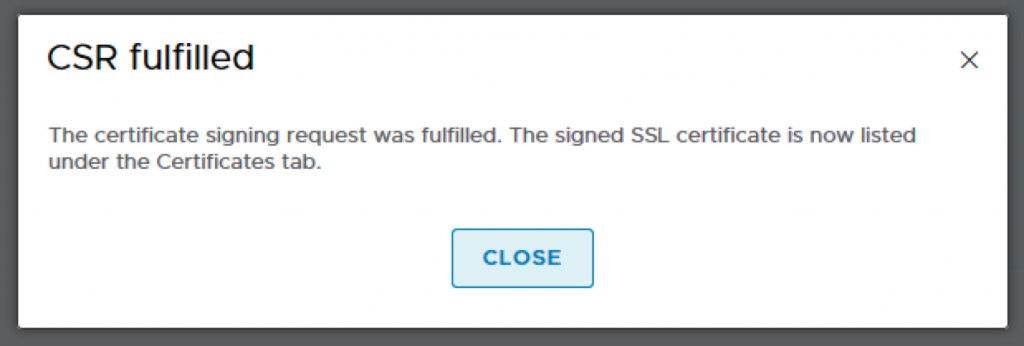
9. Back to NSX-T Manager, click on the CSR you just generated and Import the certificate which contains the NSX-T cert and the CA cert.
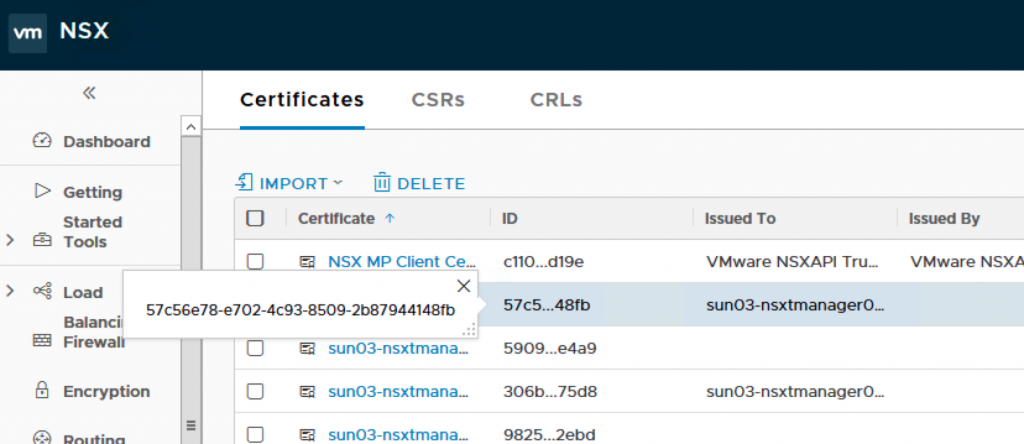
10. You will see two certs imported into the Certificates tab.
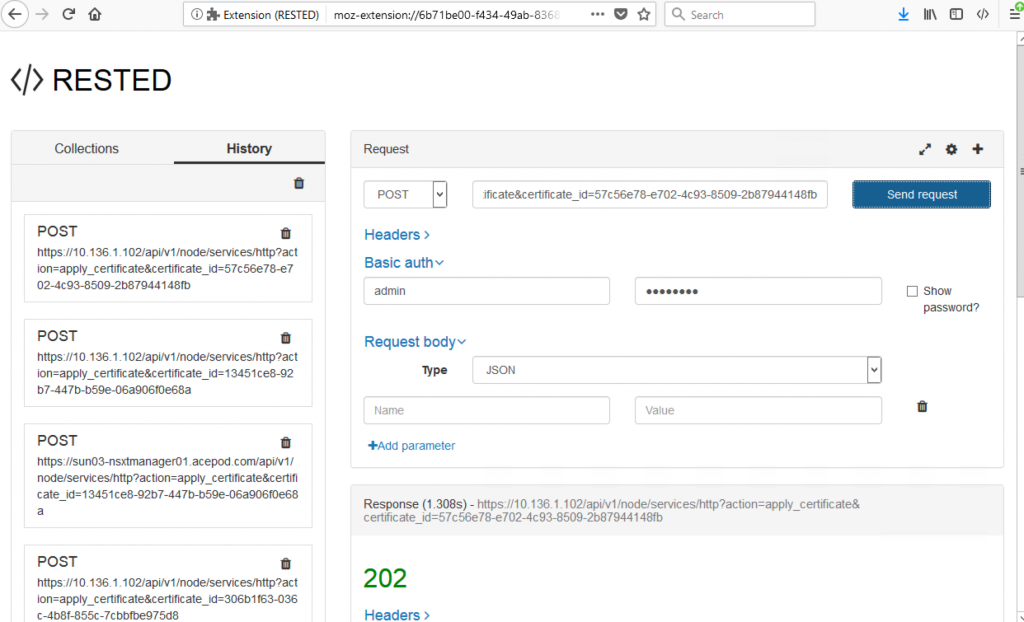
11. Next, you will need to activate cert. You will need to use a rest client to do that. Highlight on the cert and copy the ID.
You will get a 202 indicating success.
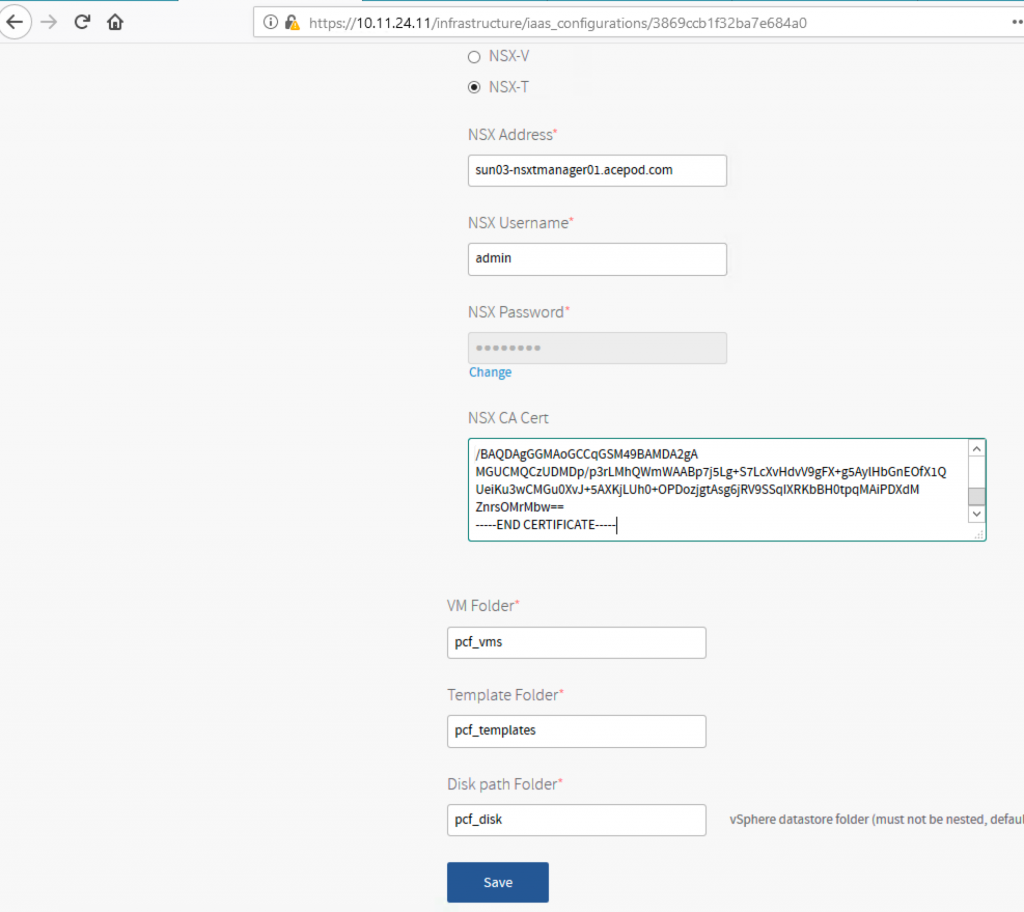
13. Place the CA Cert into NSX-T Manager.
Now, back to PCF Ops Manager, you copy the CA cert. Its the CA cert, not the NSX-T cert. On the editor where you concat, its the 2nd cert. Mine is end with Mbw==. From the screenshot below, you can see.
14. SUCCESS!!!

