Openshift or PKS – Using NSX-T API Certificate – Principal Identity
Normally for my lab or POC, I will use NSX-T admin and password for integration. However, in a production environment, customer might not accept that and therefore you might need to result to using certificate for API access. In this blog post, I will show you how to create the certificate and key to be used for Openshift Integration.
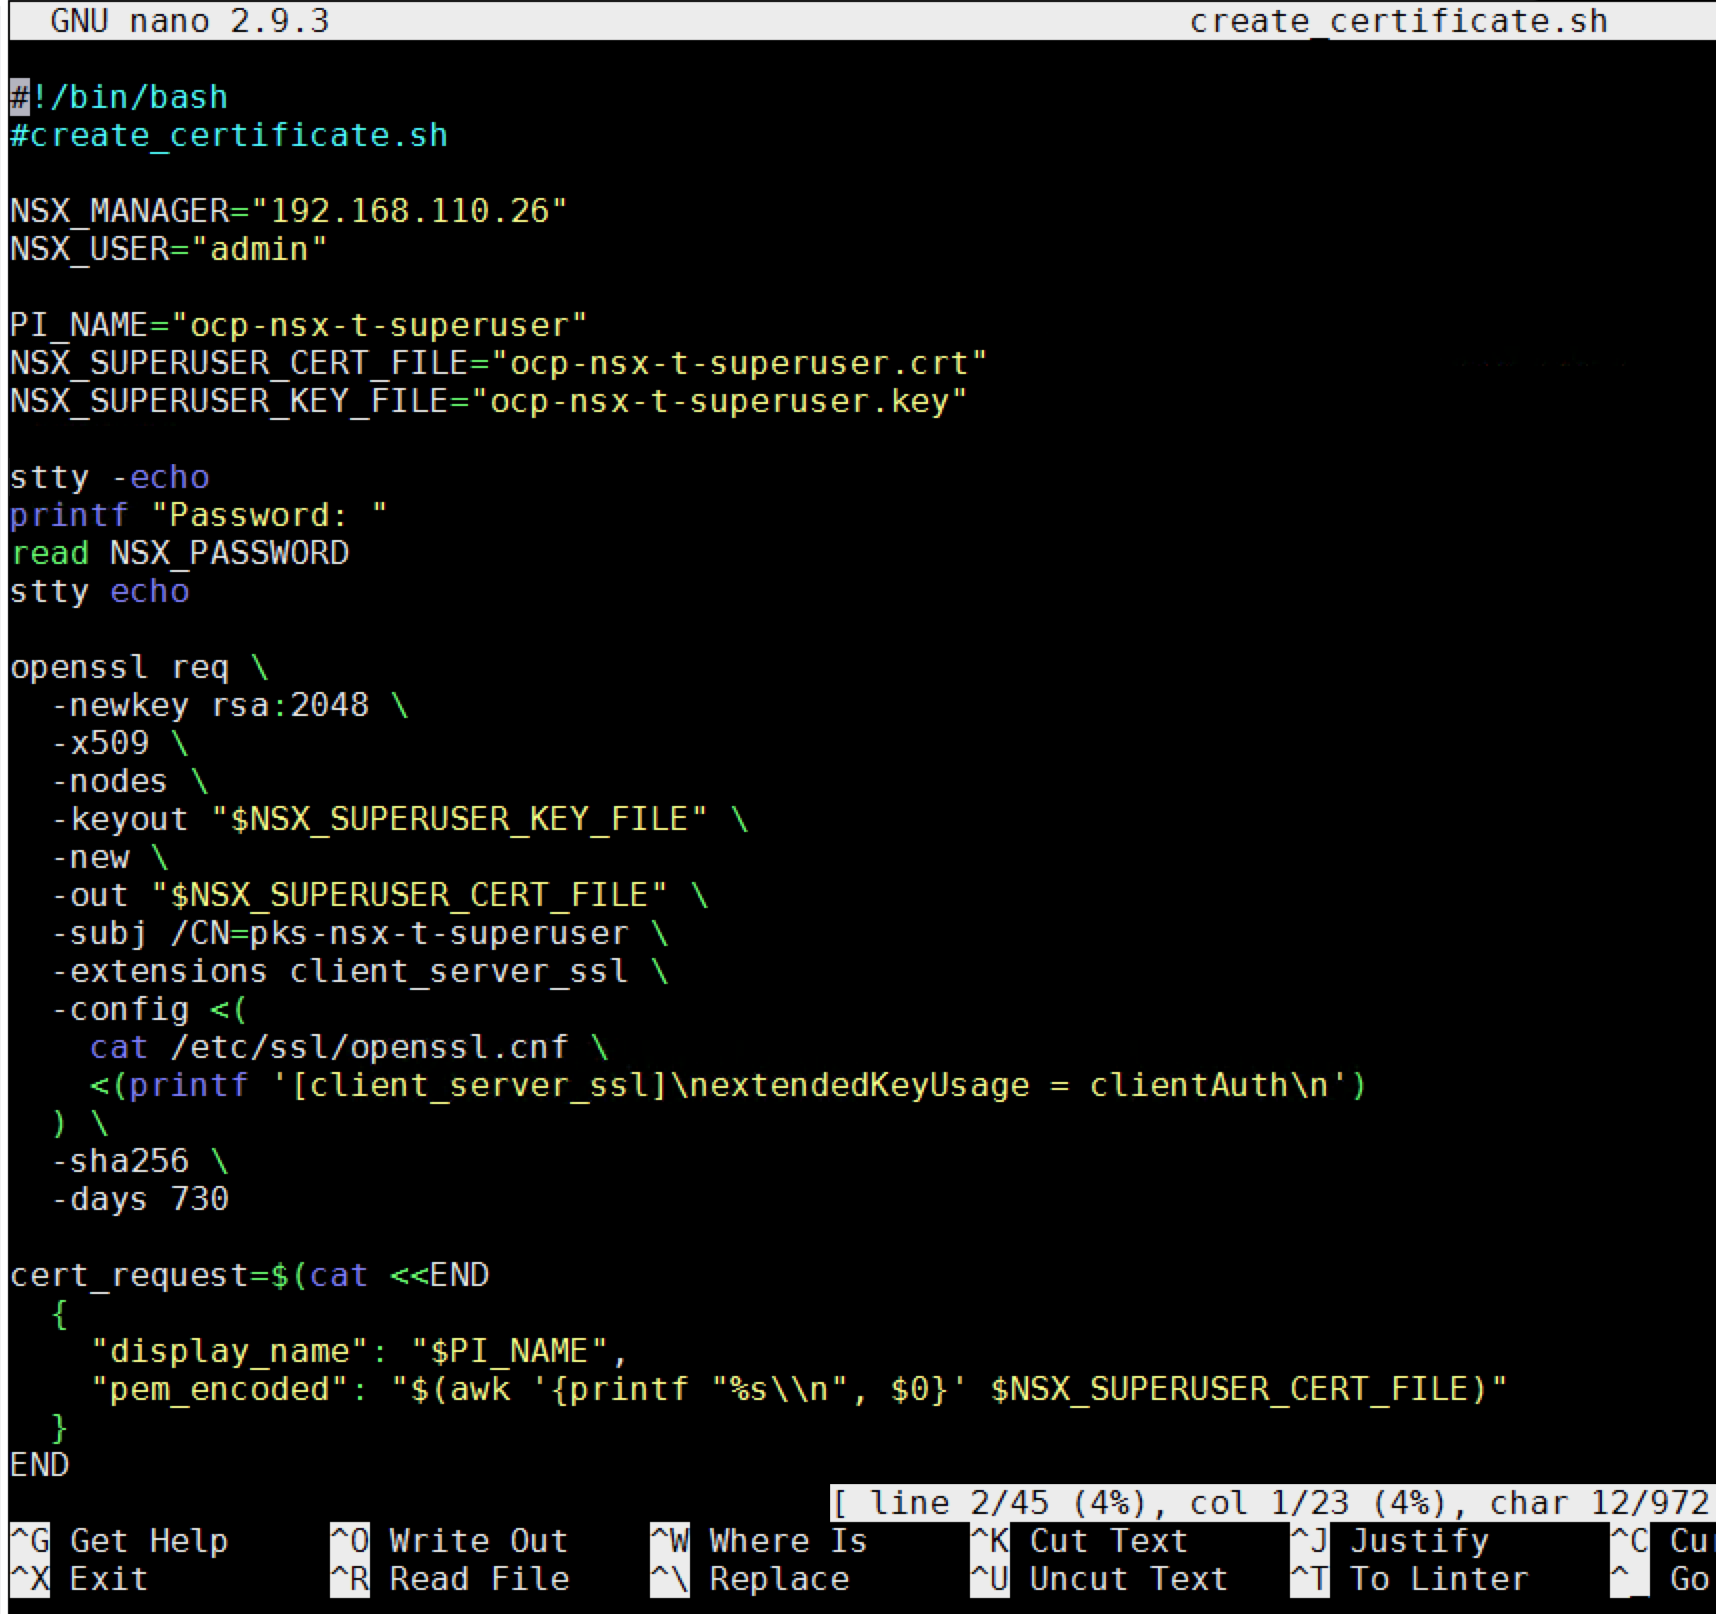
Step 1: Generate and Register the Certificate and Key
Provided below is the create_certificate.sh script that generates a certificate and private key, and then uploads the certificate to the NSX Manager. Complete the following steps to run this script:
- Log in to a Linux VM in your Openshift environment. For example, I use an ubuntu 18 jumphost.
- To create an empty file for the first script, run
nano create_certificate.sh. - Copy the following script contents into
create_certificate.sh, updating the values for the first two lines to match your environment:NSX_MANAGER_IP: IP address of the NSX Manager host.NSX_MANAGER_USERNAME: Username for NSX Manager.
#!/bin/bash
#create_certificate.sh
NSX_MANAGER="NSX_MANAGER_IP"
NSX_USER="NSX_MANAGER_USERNAME"
PI_NAME="ocp-nsx-t-superuser"
NSX_SUPERUSER_CERT_FILE="ocp-nsx-t-superuser.crt"
NSX_SUPERUSER_KEY_FILE="ocp-nsx-t-superuser.key"
stty -echo
printf "Password: "
read NSX_PASSWORD
stty echo
openssl req \
-newkey rsa:2048 \
-x509 \
-nodes \
-keyout "$NSX_SUPERUSER_KEY_FILE" \
-new \
-out "$NSX_SUPERUSER_CERT_FILE" \
-subj /CN=ocp-nsx-t-superuser \
-extensions client_server_ssl \
-config <(
cat /etc/ssl/openssl.cnf \
<(printf '[client_server_ssl]\nextendedKeyUsage = clientAuth\n')
) \
-sha256 \
-days 730
cert_request=$(cat <<END
{
"display_name": "$PI_NAME",
"pem_encoded": "$(awk '{printf "%s\\n", $0}' $NSX_SUPERUSER_CERT_FILE)"
}
END
)
curl -k -X POST \
"https://${NSX_MANAGER}/api/v1/trust-management/certificates?action=import" \
-u "$NSX_USER:$NSX_PASSWORD" \
-H 'content-type: application/json' \
-d "$cert_request"
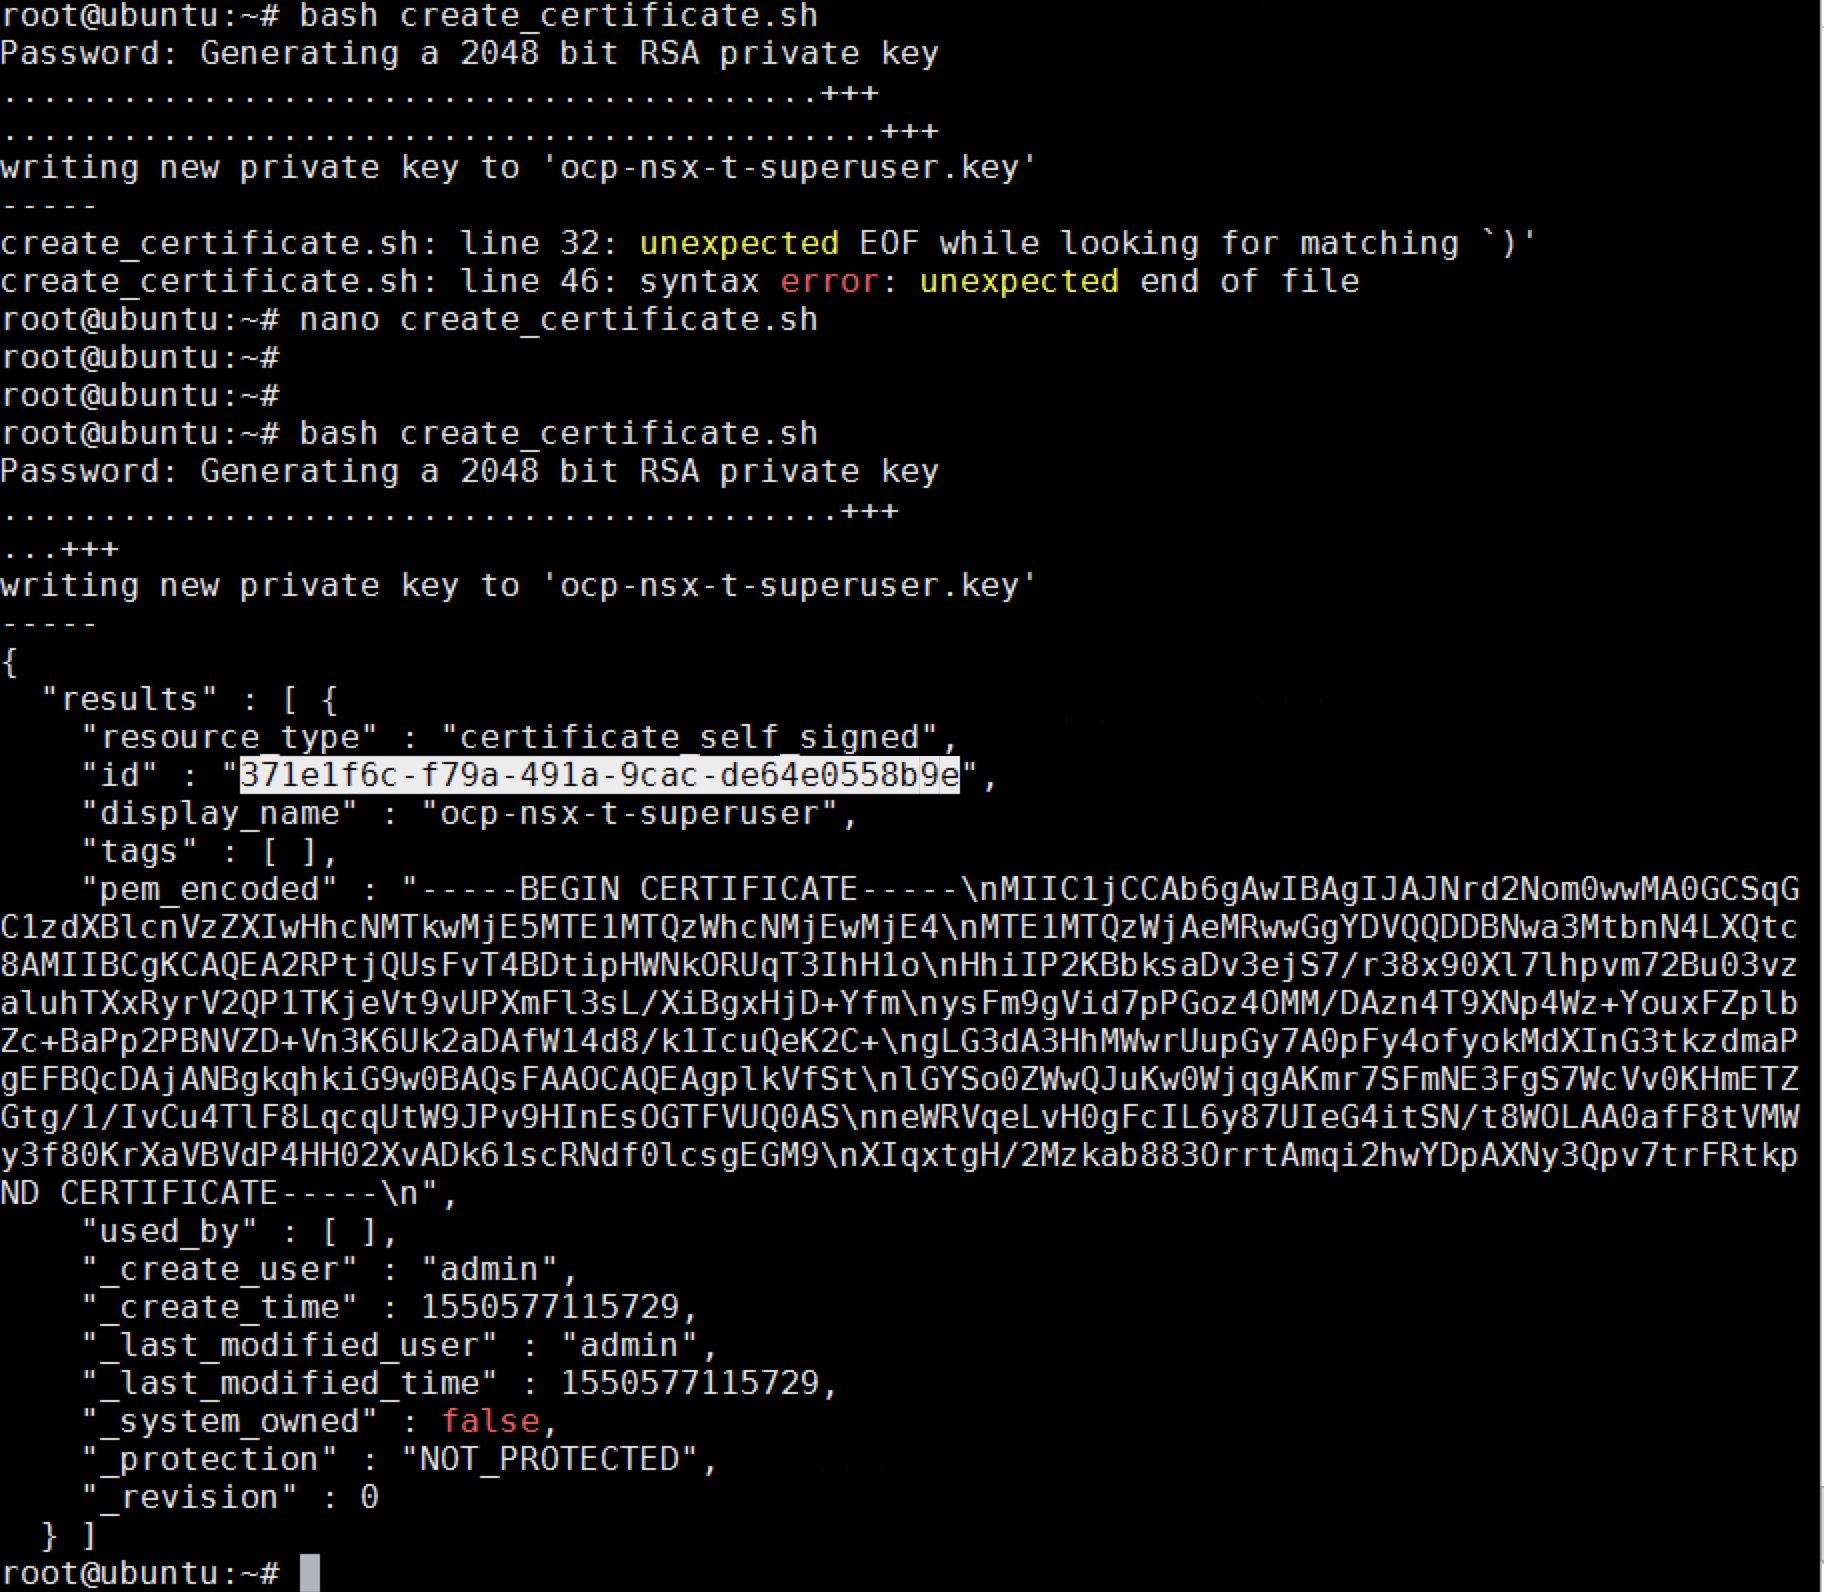
- Save the script and run
bash create_certificate.sh. - When prompted, enter the
NSX_MANAGER_PASSWORDfor the NSX user you specified in the script. - Complete the following steps to verify the results of the script:
- The certificate,
ocp-nsx-t-superuser.crt, and private key, ocp-nsx-t-superuser.key, are generated in the directory where you ran the script. - The certificate is uploaded to the NSX Manager and the
CERTIFICATE_IDvalue is returned to the console. You need this ID for the second script. 
- The certificate,
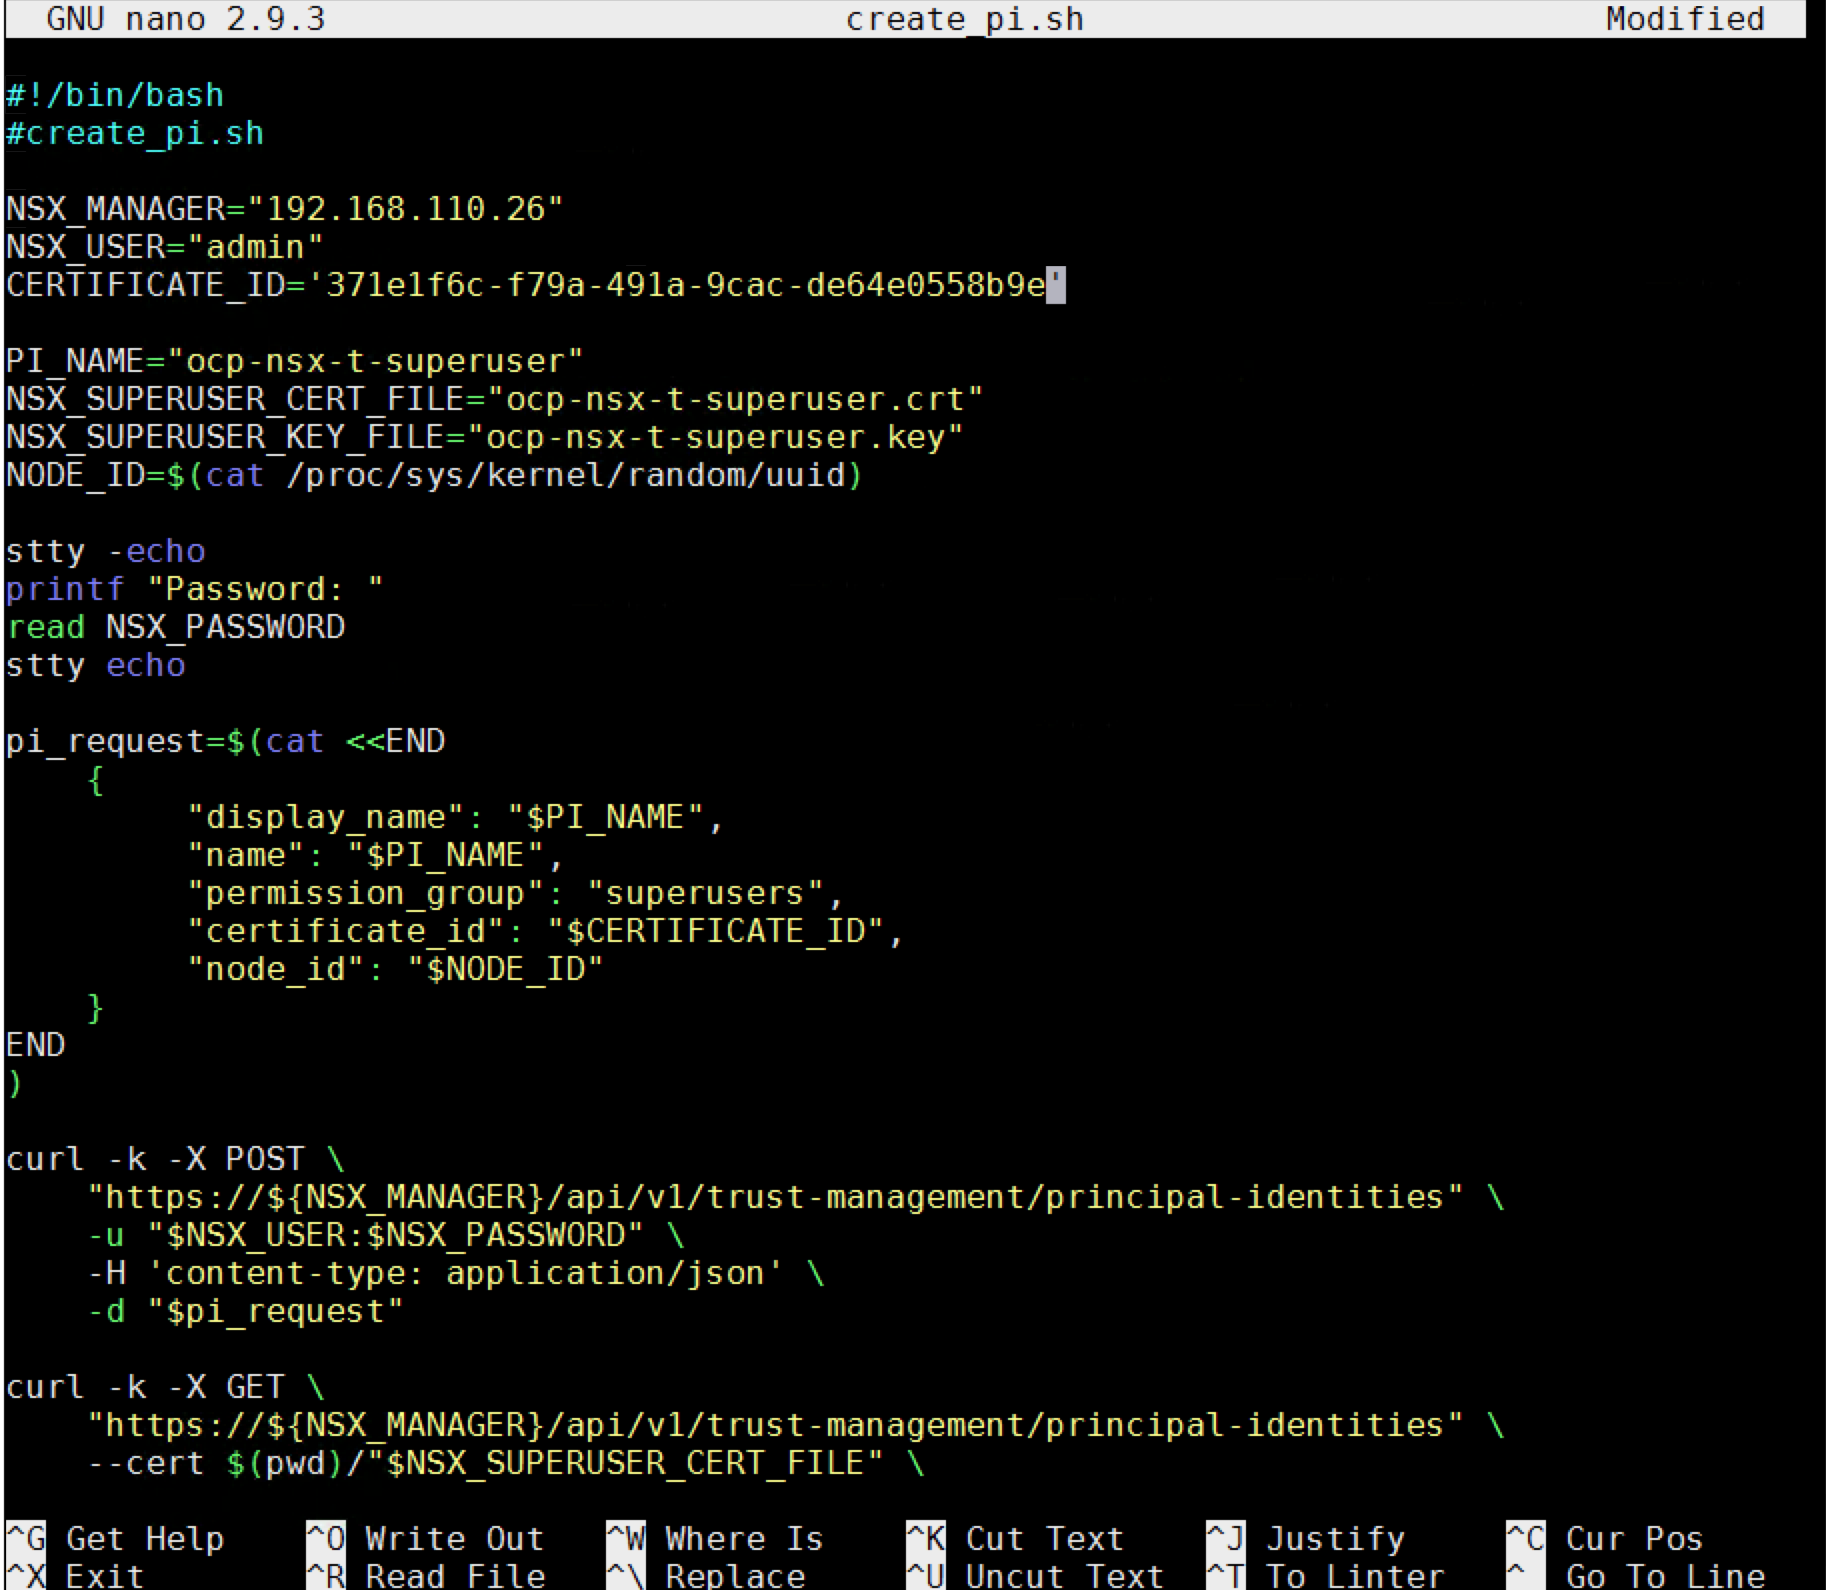
Step 2: Create and Register the Principal Identity
Provided below is the create_pi.sh script that creates the principal identity and registers it with the NSX Manager. This script requires the CERTIFICATE_ID returned from the create_certificate.sh script.
Note: Perform these steps on the same Linux VM where you ran the create_certificate.sh script.
- To create an empty file for the second script, run
nano create_pi.sh. - Copy the following script contents into
create_pi.sh, updating the values for the first three lines to match your environment:NSX_MANAGER_IP: IP address of the NSX Manager host.NSX_MANAGER_USERNAME: Username for NSX Manager.CERTIFICATE_ID: Response from thecreate_certificate.shscript.#!/bin/bash #create_pi.sh
NSX_MANAGER=“NSX_MANAGER_IP” NSX_USER=“NSX_MANAGER_USERNAME” CERTIFICATE_ID=‘CERTIFICATE_ID’
PI_NAME=“ocp-nsx-t-superuser” NSX_SUPERUSER_CERT_FILE=“ocp-nsx-t-superuser.crt” NSX_SUPERUSER_KEY_FILE=“ocp-nsx-t-superuser.key” NODE_ID=$(cat /proc/sys/kernel/random/uuid)
stty -echo printf “Password: “ read NSX_PASSWORD stty echo
pi_request=$(cat <<END { “display_name”: “$PI_NAME”, “name”: “$PI_NAME”, “permission_group”: “superusers”, “certificate_id”: “$CERTIFICATE_ID”, “node_id”: “$NODE_ID” } END )
curl -k -X POST
“https://${NSX_MANAGER}/api/v1/trust-management/principal-identities”
-u “$NSX_USER:$NSX_PASSWORD”
-H ‘content-type: application/json’
-d “$pi_request”
curl -k -X GET
“https://${NSX_MANAGER}/api/v1/trust-management/principal-identities”
–cert $(pwd)/“$NSX_SUPERUSER_CERT_FILE”
–key $(pwd)/“$NSX_SUPERUSER_KEY_FILE”
- Save the script and run
bash create_pi.sh. - When prompted, enter the
NSX_MANAGER_PASSWORDfor the NSX user you specified in the script.[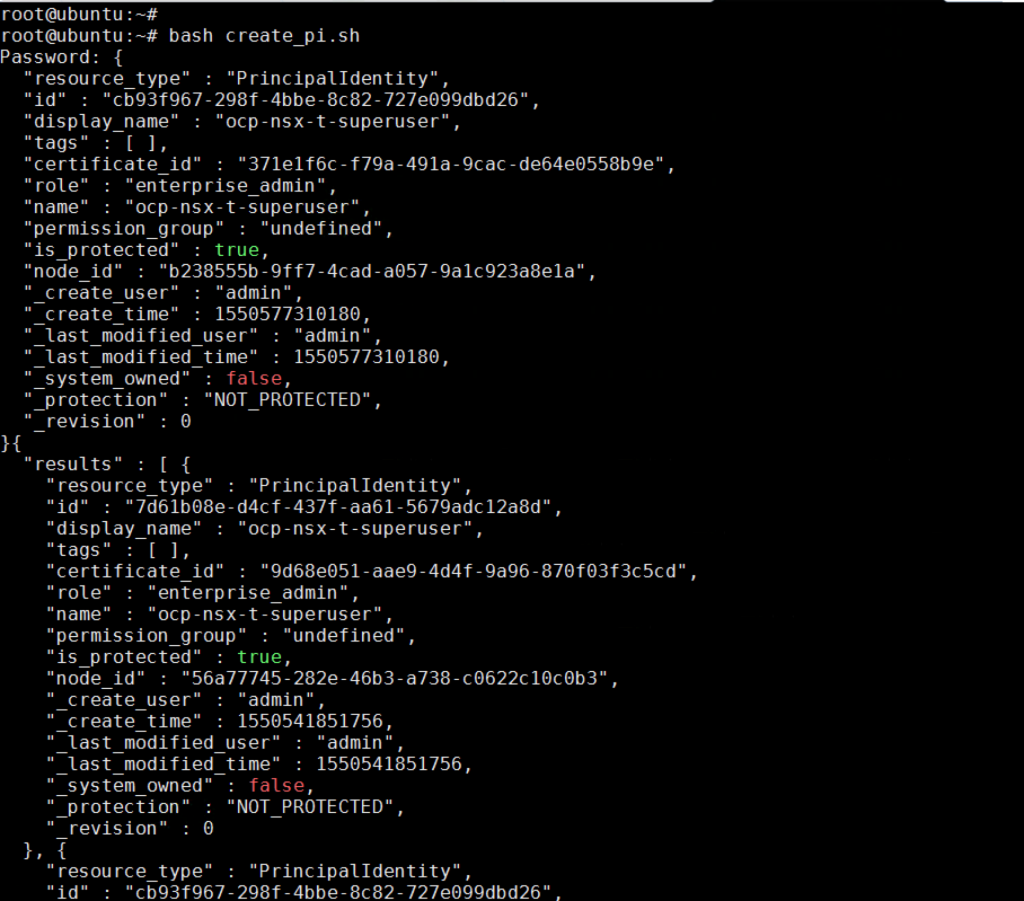
]2
5. In your folder, you should have two files. ocp-nsx-t-superuser.crt and ocp-nsx-t-superuser.key.[
]3 6. Copy the two files to master and nodes using SCP
scp ocp-nsx-t-superuser.crt ocp-nsx-t-superuser.key root@10.11.1.10:/root/
scp ocp-nsx-t-superuser.crt ocp-nsx-t-superuser.key root@10.11.1.11:/root/
scp ocp-nsx-t-superuser.crt ocp-nsx-t-superuser.key root@10.11.1.12:/root/
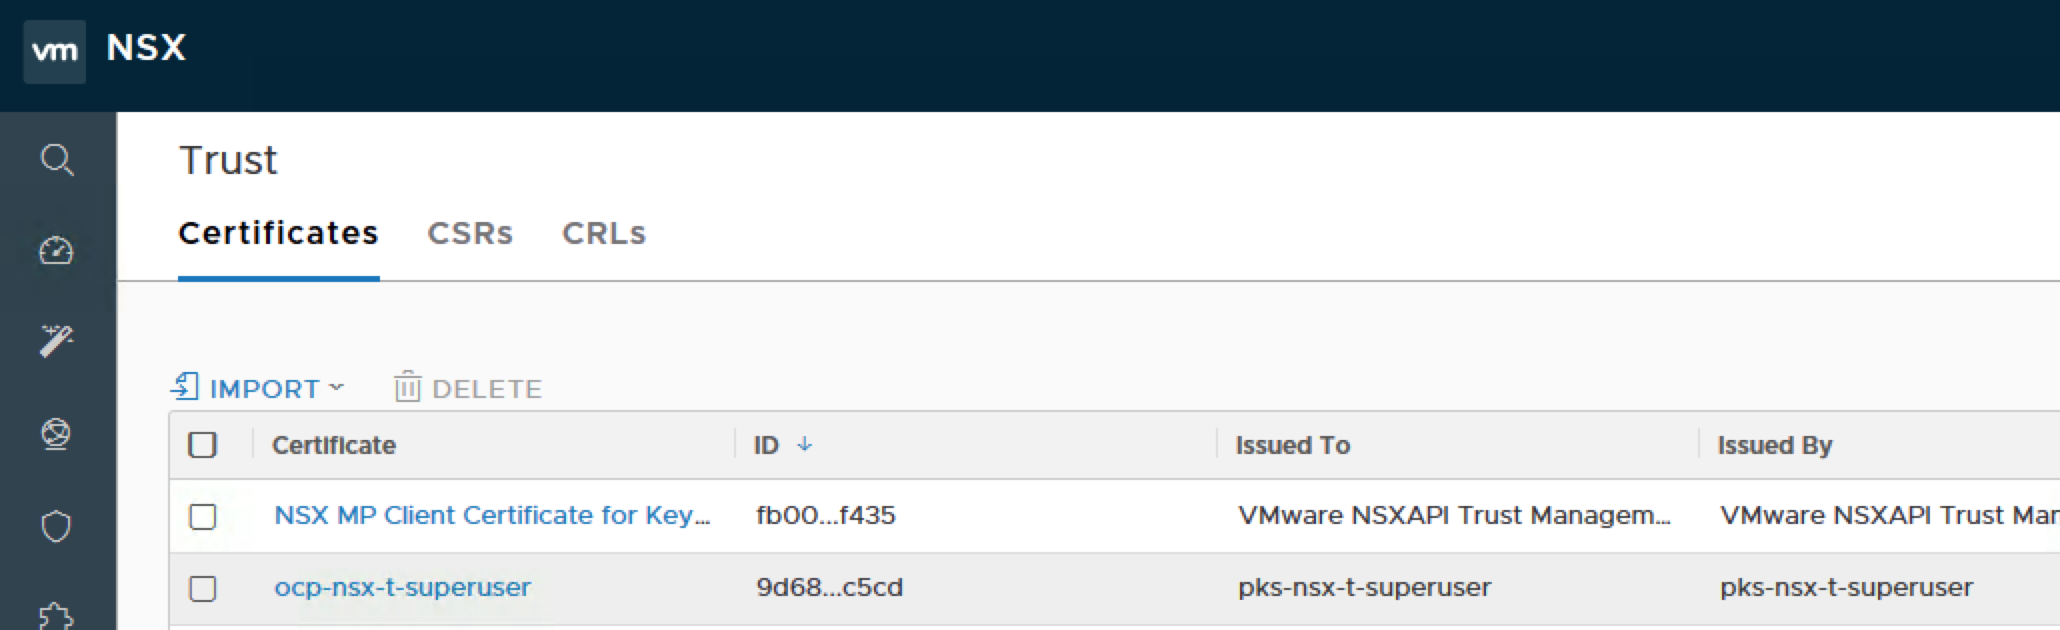
At the NSX-T Manager, you can view the principal identities.
[

]4 8. Back to your master node, you can now amend the ansible host file.
> nsx\_api\_cert=’/root/ocp-nsx-t-superuser.crt’ nsx\_api\_private_key=’/root/ocp-nsx-t-superuser.key’
>
> _**be aware when you copy and paste the character ‘_
[<img class="alignnone size-large wp-image-1100" src="http://blog.acepod.com/wp-content/uploads/2019/02/Screen-Shot-2019-02-19-at-8.17.45-PM-1024x513.png" alt="Screen Shot 2019-02-19 at 8.17.45 PM" width="665" height="333" />][5]</li> </ol>
References:
<https://docs.pivotal.io/runtimes/pks/1-3/generate-nsx-pi-cert.html>
<https://github.com/openshift/openshift-ansible/blob/release-3.11/roles/nsx/README.md>