Tanzu vSphere 7 with Kubernetes on NSX-T 3.0 VDS Install Part 2: ESXi, vCenter, VDS Config and NSX-T Manager
In this article, we will prepare the vSphere and NSX components required for the vSphere with Kubernetes.
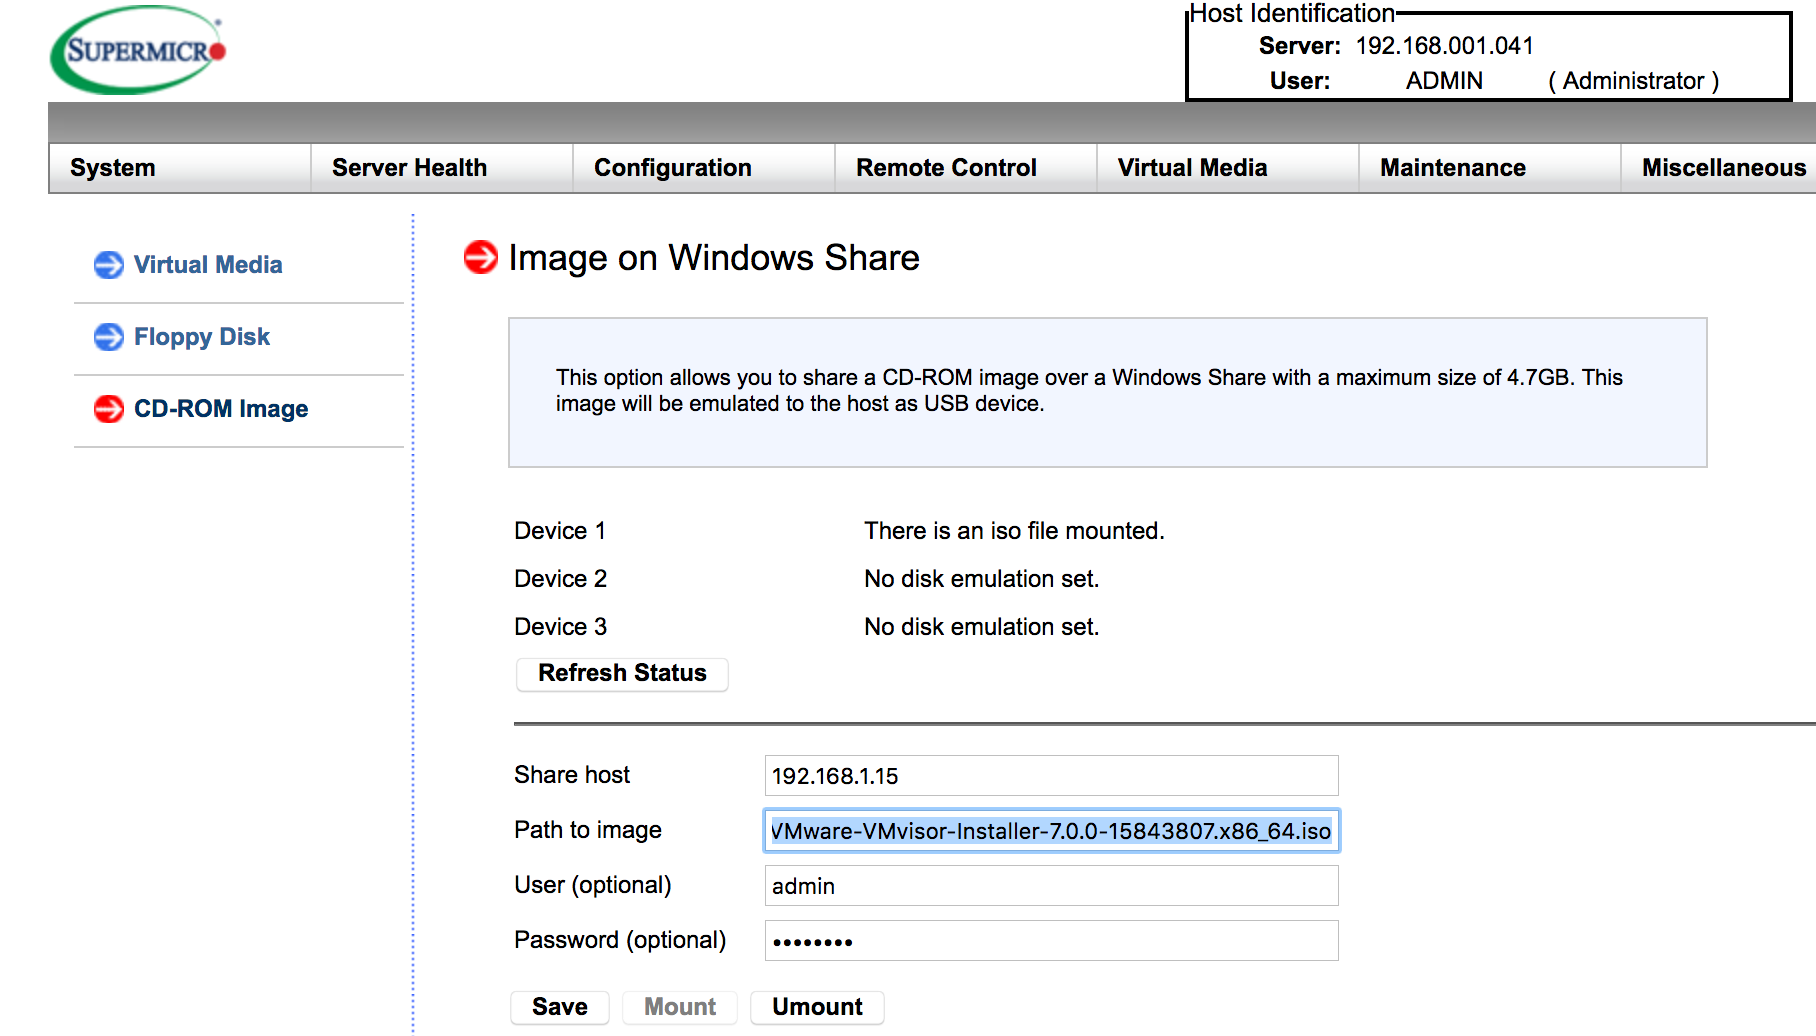
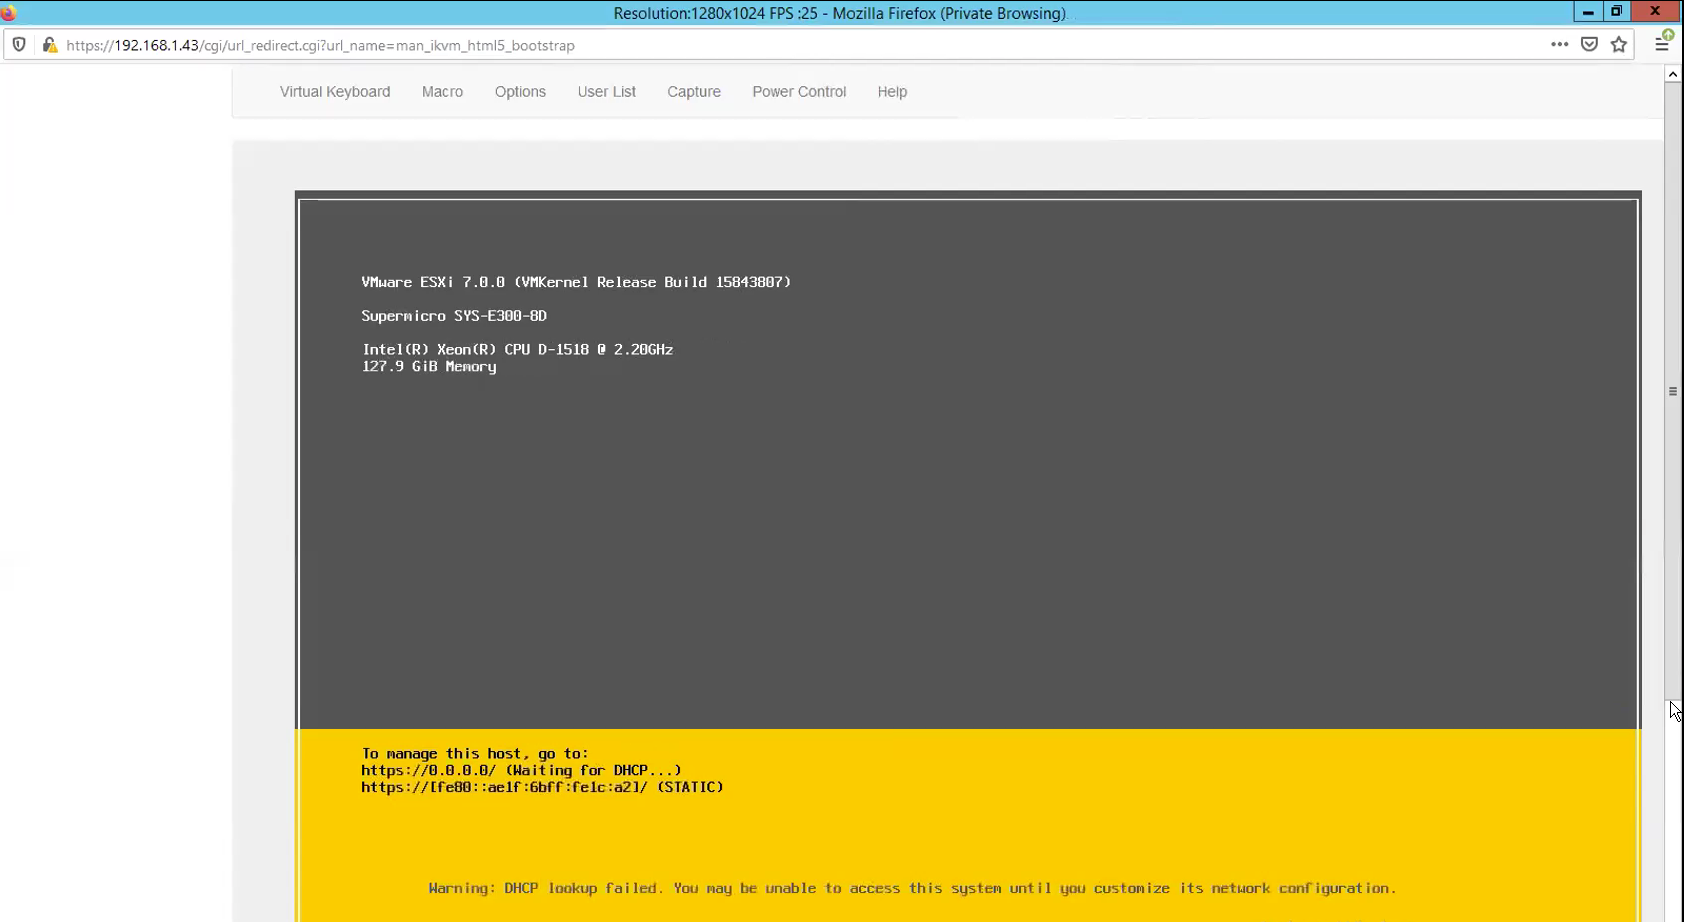
Step 1 – Install the ESXi 7.0 on to the hosts. For me, I found it very convenient to just place the iso file onto a NAS then mount it on the virtual CD-ROM feature on the Supermicro IPMI. This is so much easier as compared to create a bootable USB.
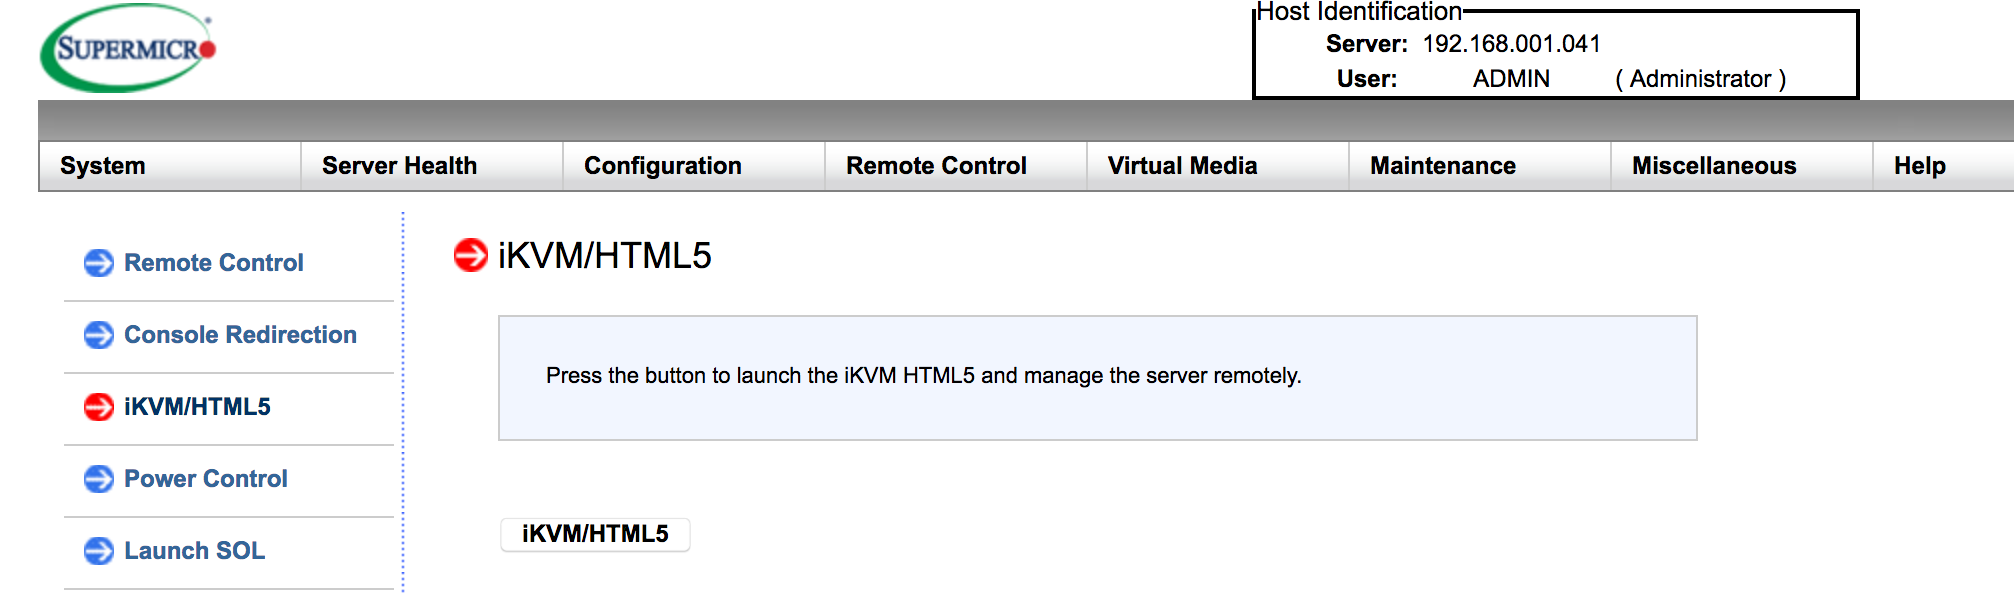
Installing ESXi using the Supermicro Remote Control iKVM/HTML5 Client.
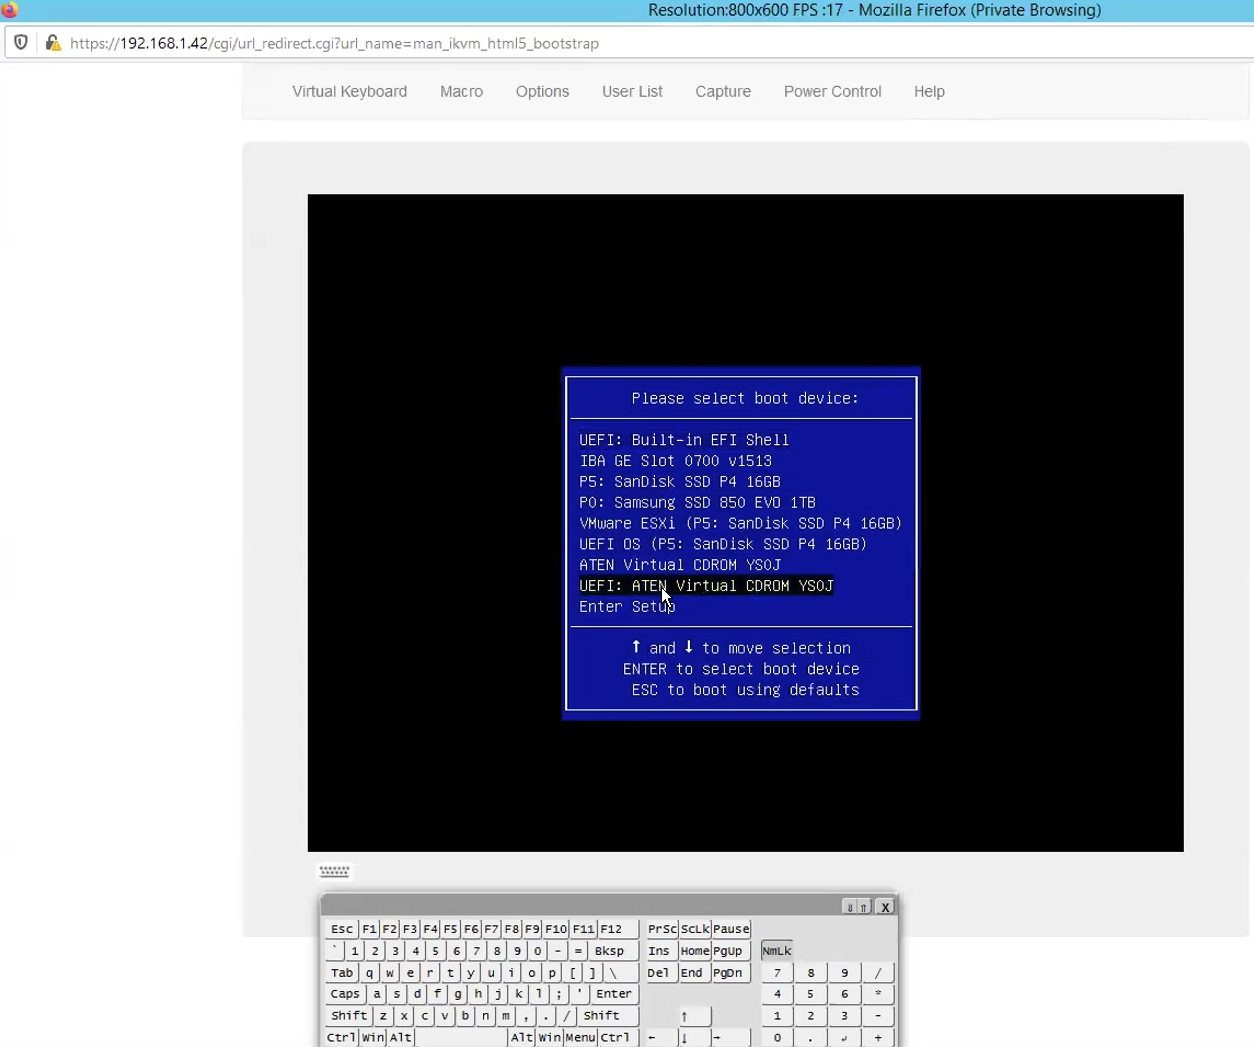
Select the Virtual CDROM during the host boot up process.
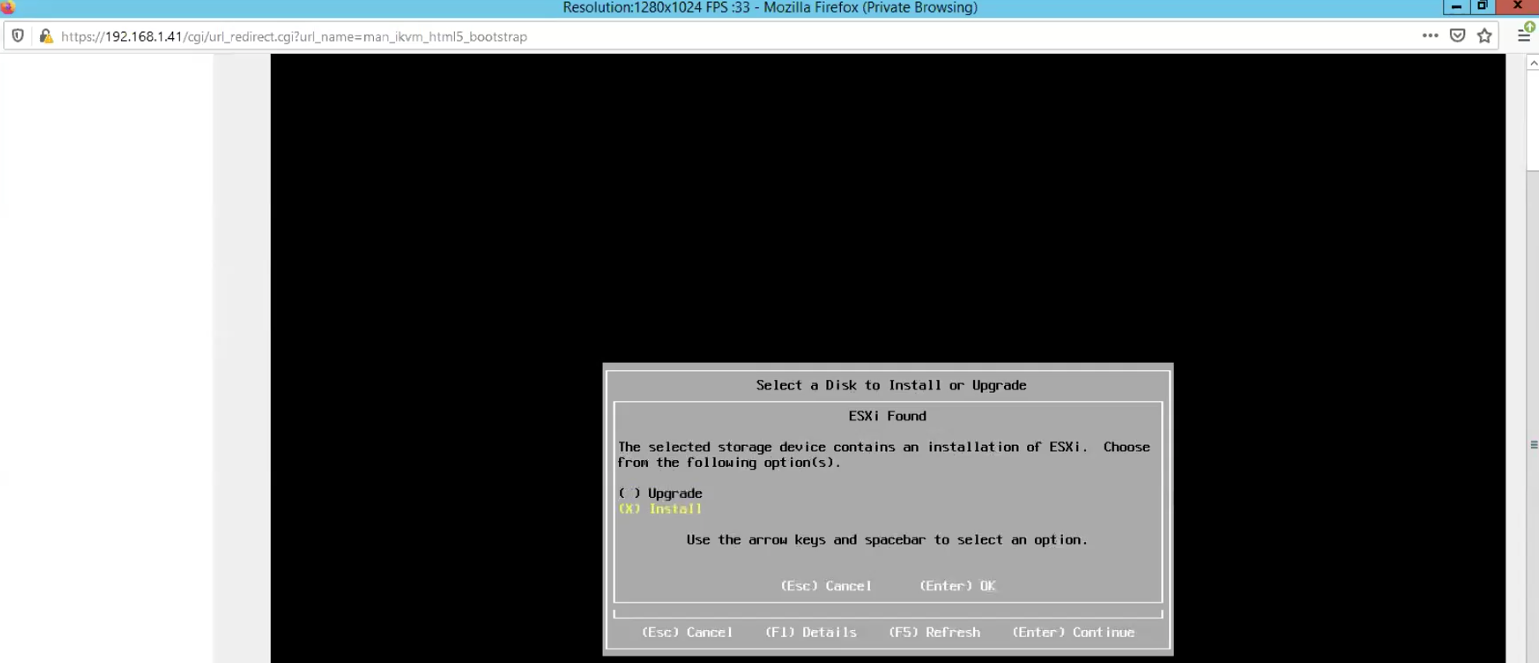
Although I have previously beta versions of ESXi 7.0 installed, I could choose the upgrade option. I did successfully upgrade through this method during the beta testing times and save me time from configuring the IP addresses, hostnames, etc everytime. Since this installation is going on the GA version, I think its worthwhile to do a fresh install. Therefore, I pick the Install option which will overwrite. As likely, most of the readers of this article when doing for POC, is likely to go for fresh install option.
vSphere ESXi7.0 successfully installed. I basically repeat the above steps for rest of the ESXi hosts.
I will basically skip explaining the steps of configuring the ESXi hosts for hostname, IP addresses, VLANs and enabling SSH for troubleshooting purposes as its pretty much self explanatory. I did record the process though and will probably putting up video to show the process.
Step 2 – Install the vCenter Appliance. I typically prefer to install vCenter using CLI and ovftool. As I use a Windows Server jumphost, what I did was just mount the vCenter ISO as a CDROM drive and I pretty much trigger the installation script straight from the jumphost.
You can find the CLI installation scripts in the vCenter Install ISO.
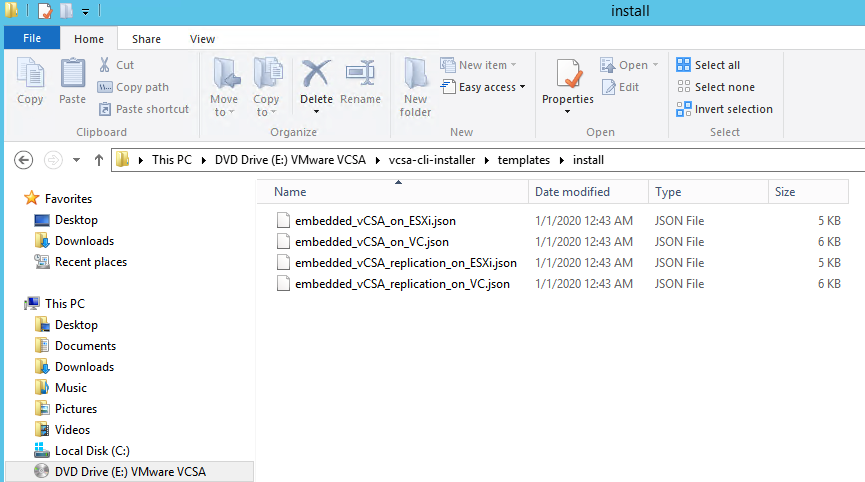
I use the embedded_vCSA_on_VC.json.
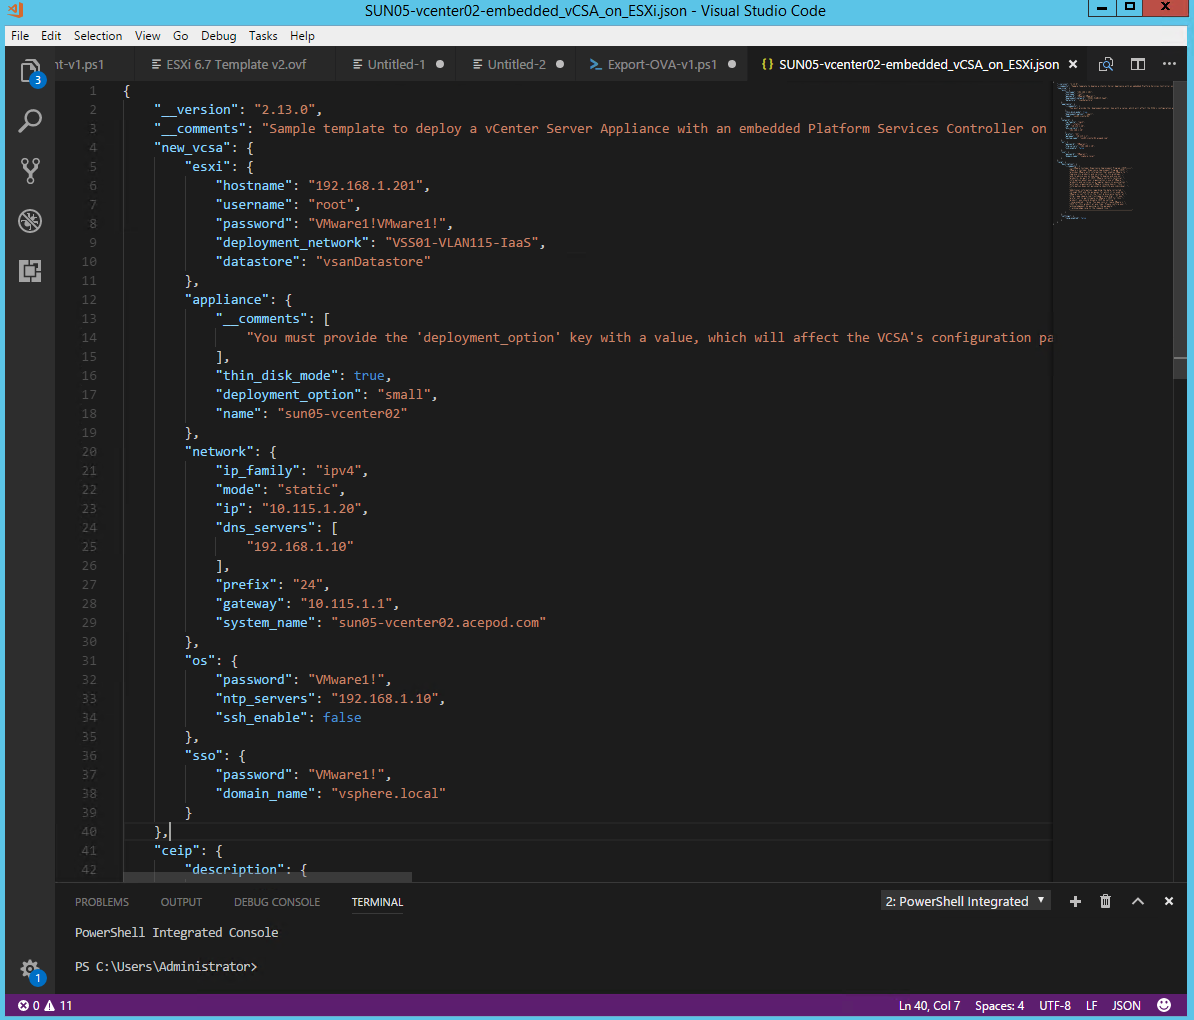
Install-vCenter02.bat file :-
E:\vcsa-cli-installer\win32\vcsa-deploy.exe install Z:\Scripts\SUN05-vcenter02-embedded_vCSA_on_ESXi.json –accept-eula –no-ssl-certificate-verification
Pause
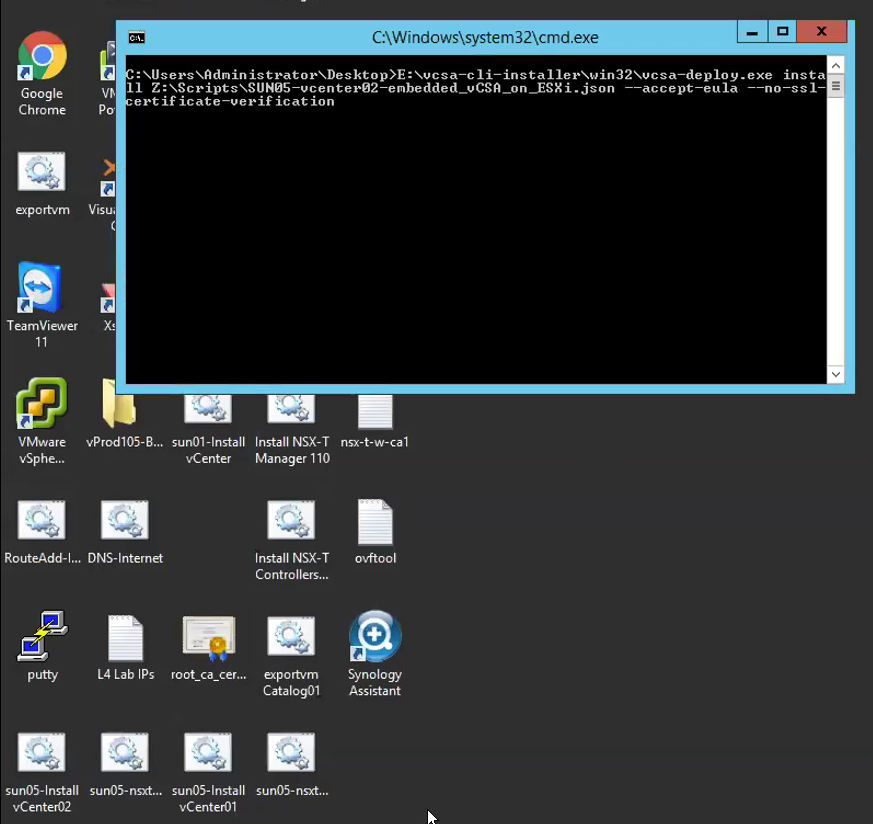
This completes the installation of vCenter.
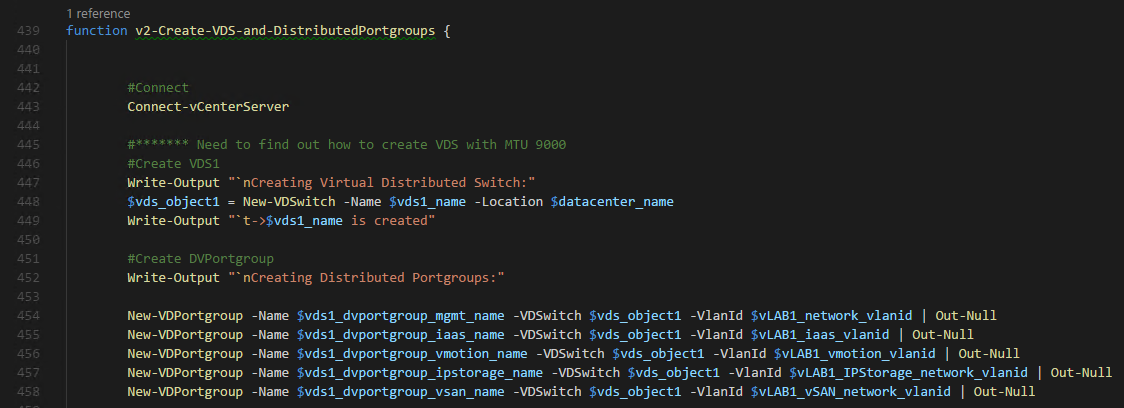
Step 3 – Configuring virtual DC, Clusters, Adding Hosts to Clusters and Creation of VDS. Again, I typically configure the above mention items through script and I use PowerCLI. There are other automation tools like Ansible or Terraform where you can consider.
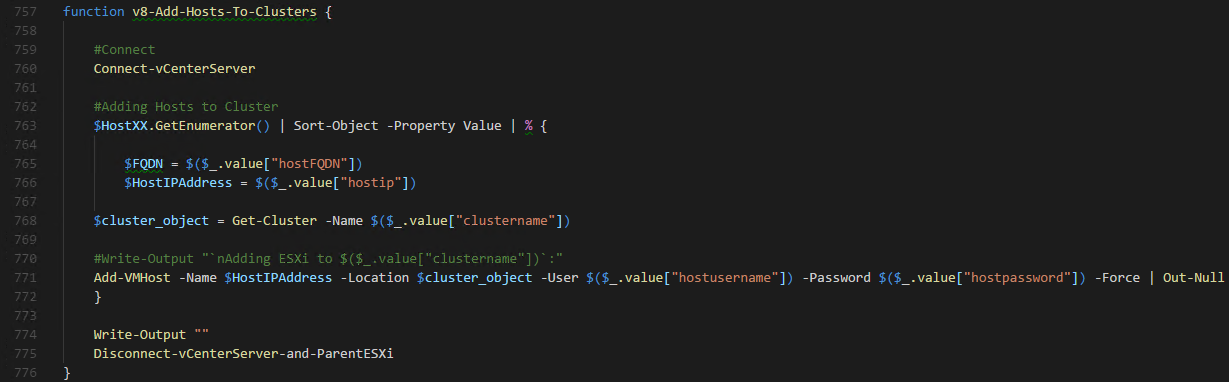
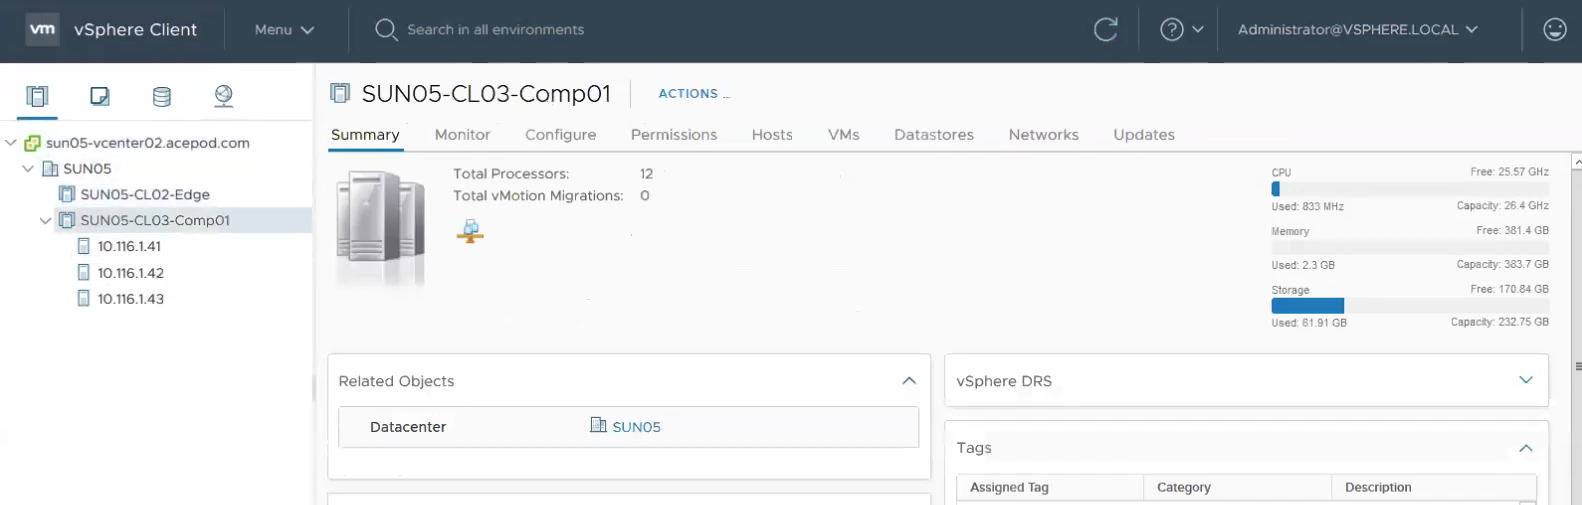
This is how it looks like after all the hosts have been added to the Cluster.
Next is to enable DRS and vSphere HA on the vSphere cluster. This will be check when you are enable vSphere with Kubernetes, specifically call Workload Management. 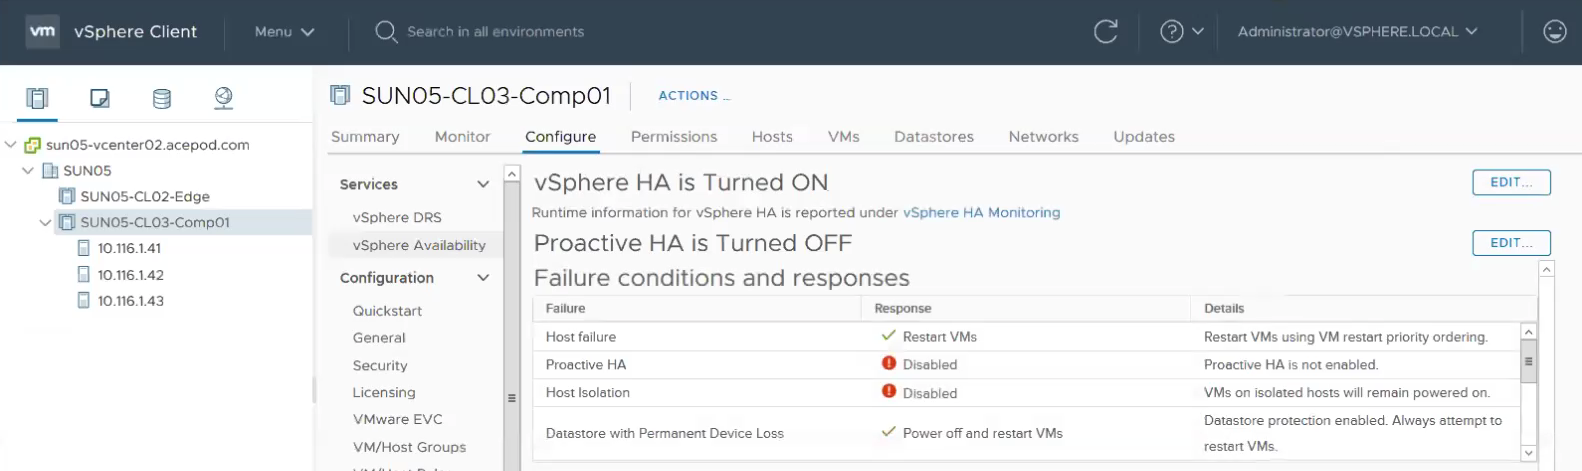
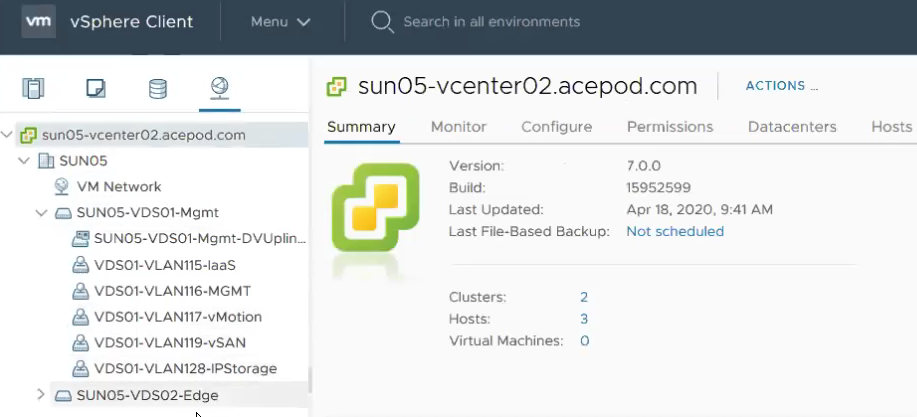
I also have created the VDS and Portgroups using PowerCLI. Although there are two VDS created, only one VDS will be used. In this the SUN05-VDS01-Mgmt VDS would be used.
After running the PowerCLI script, you can see now VDS and the related portgroups were created at vCenter.
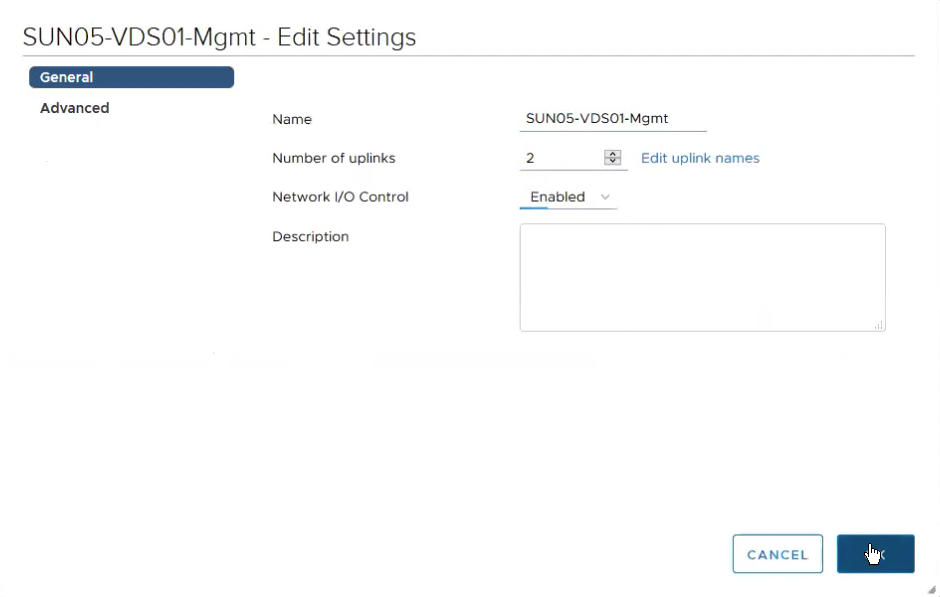
Edit settings on the VDS swtich, changing number of uplinks to 2 and also enable NIOC.
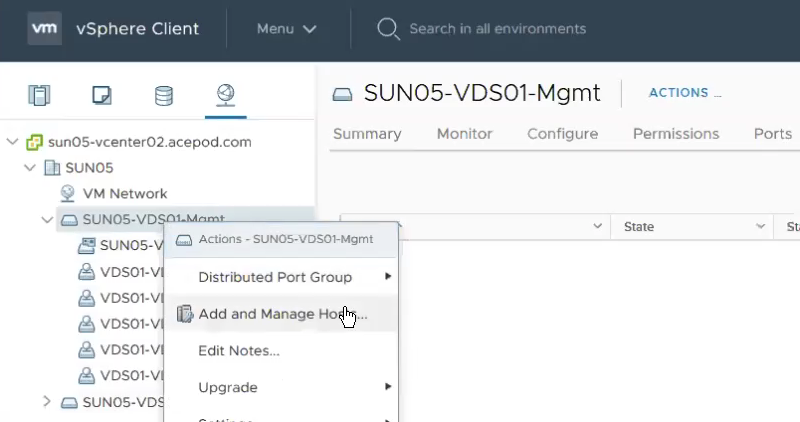
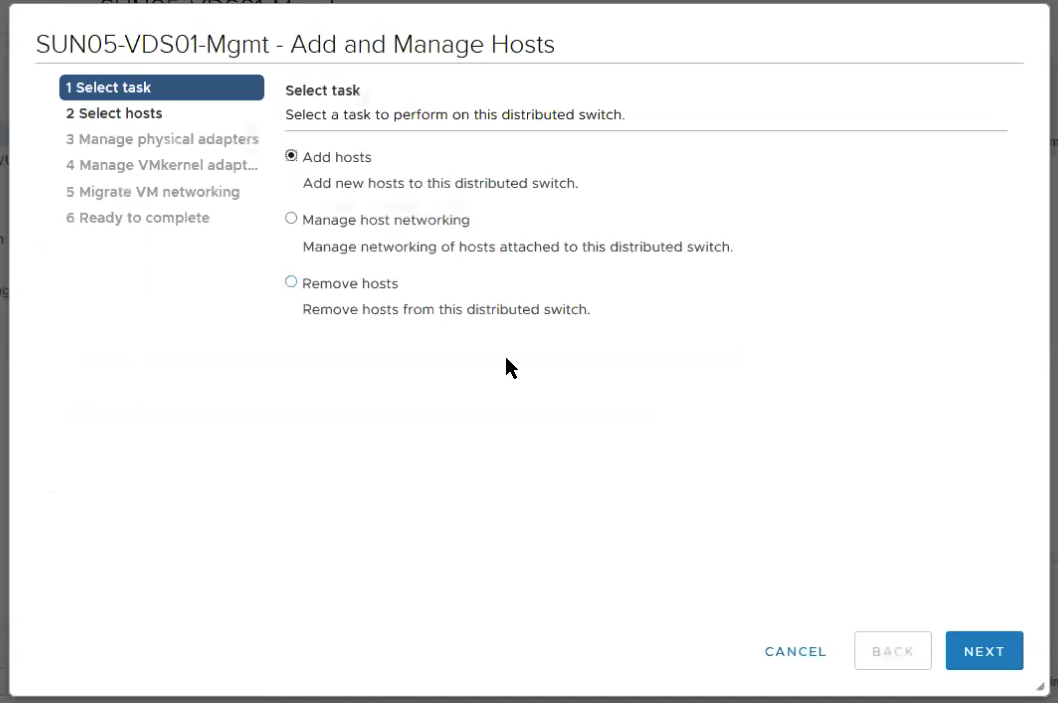
Adding Hosts to VDS and configuring Uplinks. Right click on SUN05-VDS01-Mgmt, Click on Add and Manage Hosts..
Select Add hosts
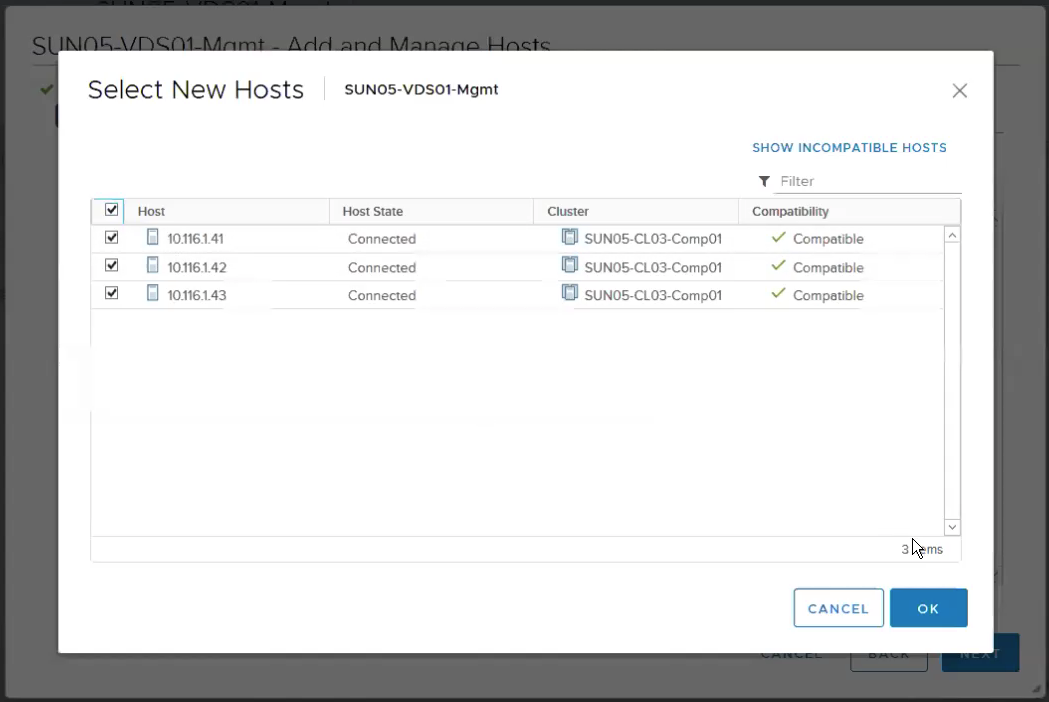
Select all the new hosts

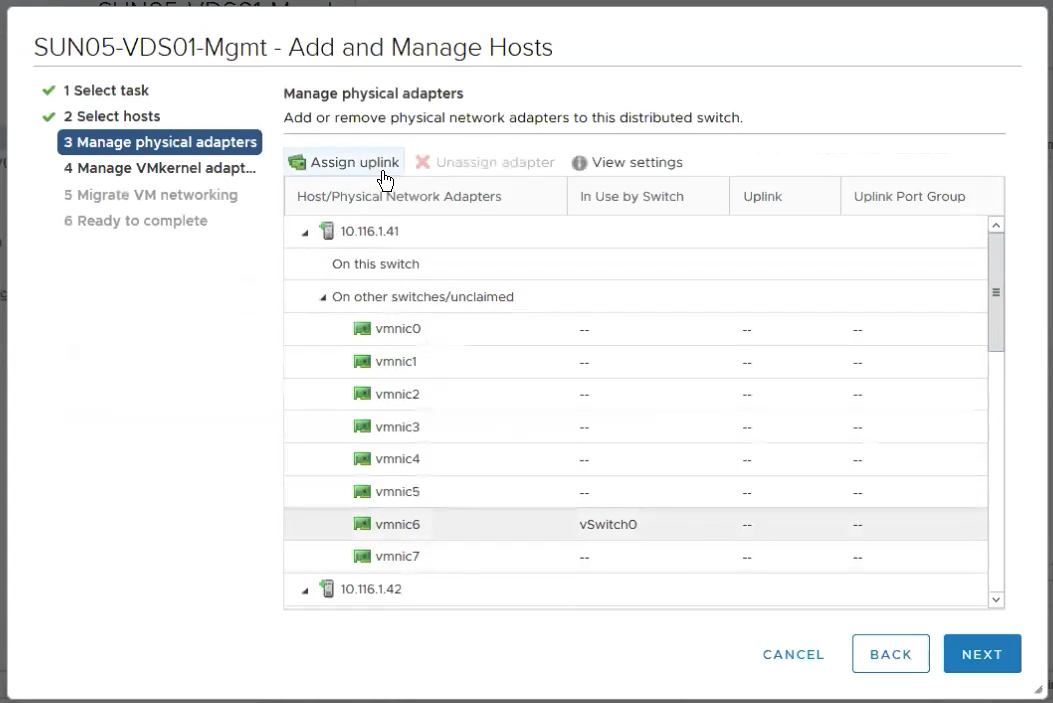
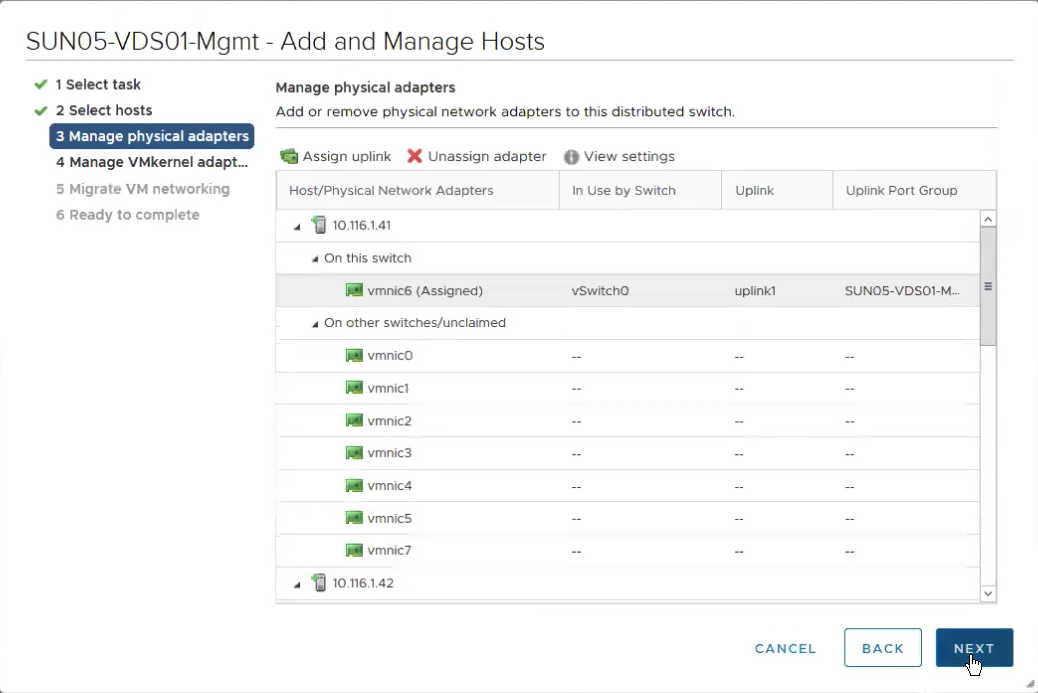
Click on Assign uplink on the NIC which is currently use by vSwitch0.
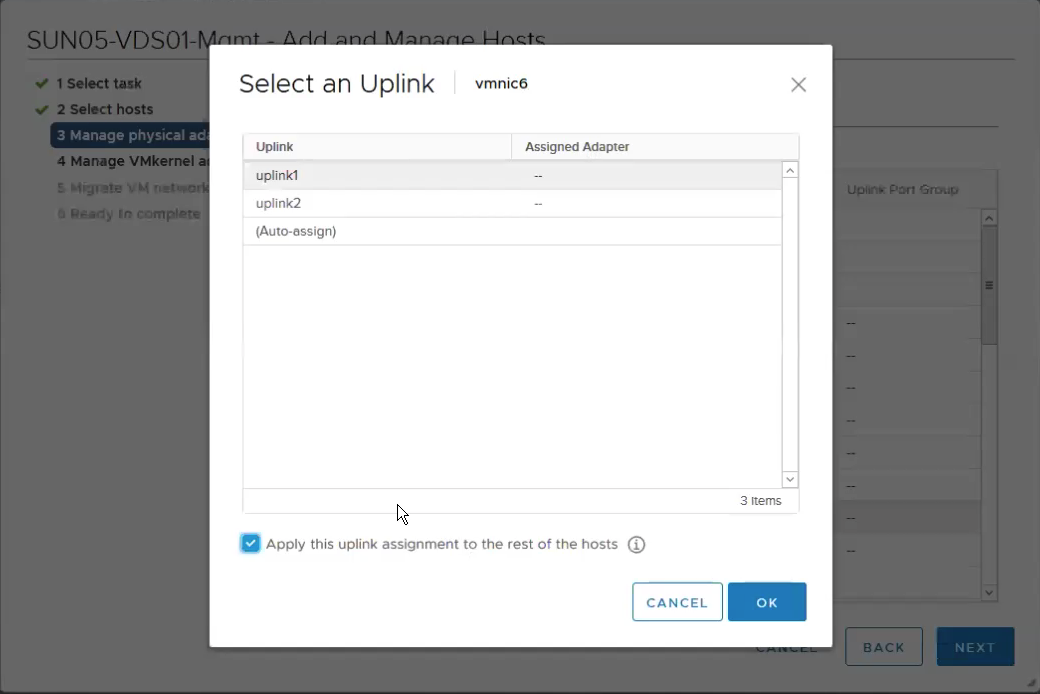
Assign to uplink1. Since all my hosts vmincs are homogenous, a convenient way is make this config applied to all the hosts is to click on the “Apply this uplink assignment to the rest of the hosts”.
Review the configurations…
We are also going to migrate the management vmkernels interfaces from Standard vSwitch(vSwitch0) to VDS as well.
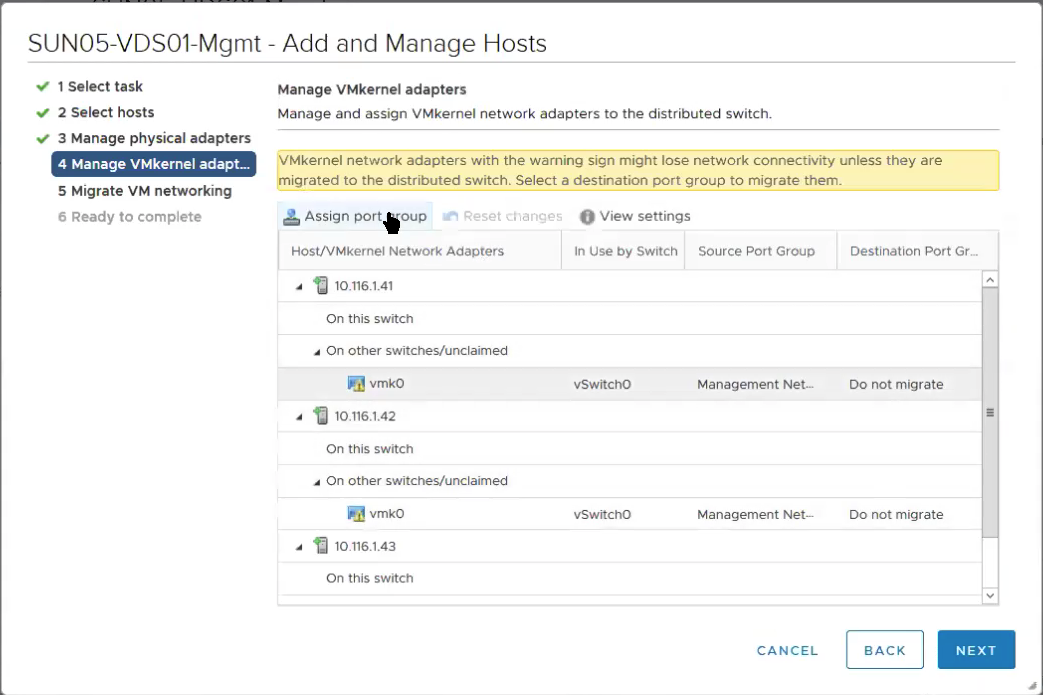
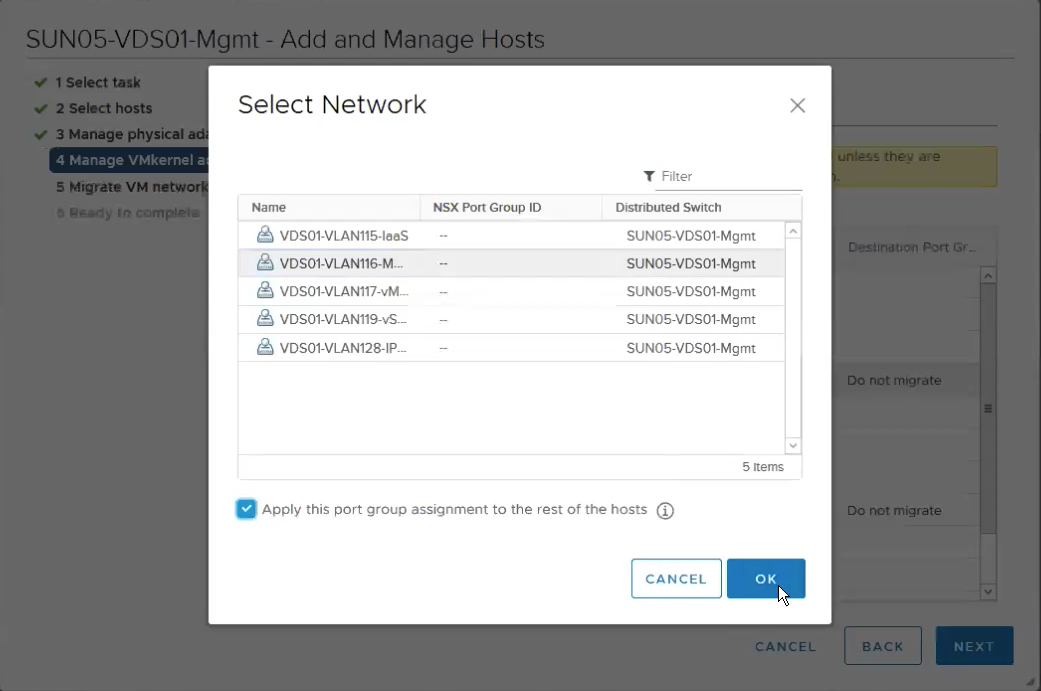
Select the VDS portgroup, in my case is the VDS01-VLAN116-Mgmt which has a VLAN tag ID of 116.
Review settings again…
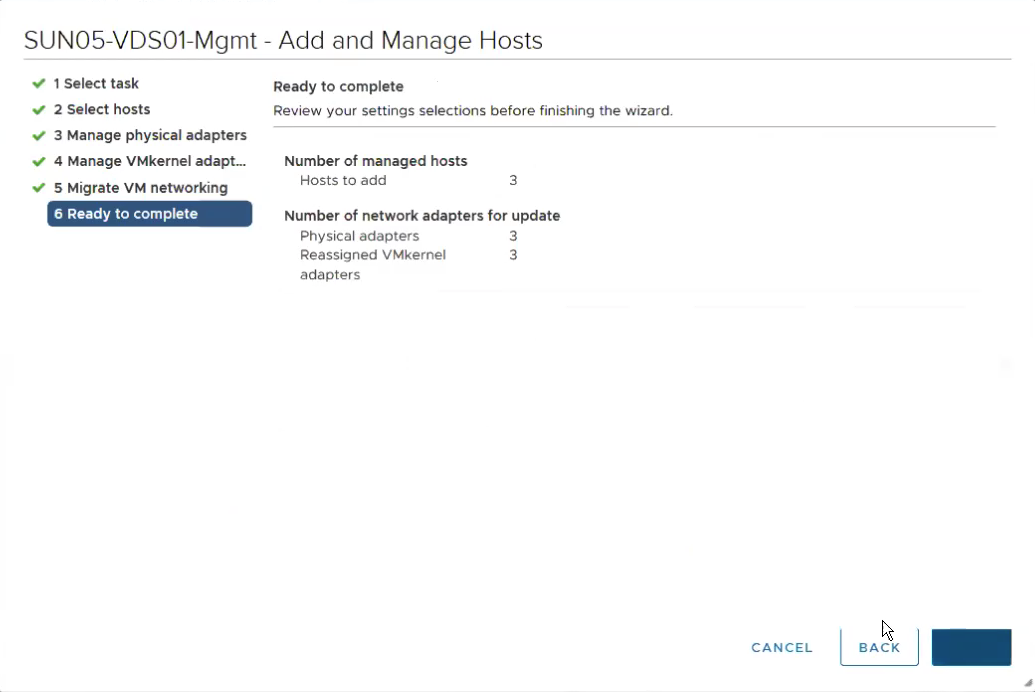
The following shows that the vmnic migration from standard switch as well as the management vmkernels were successfully migrated.
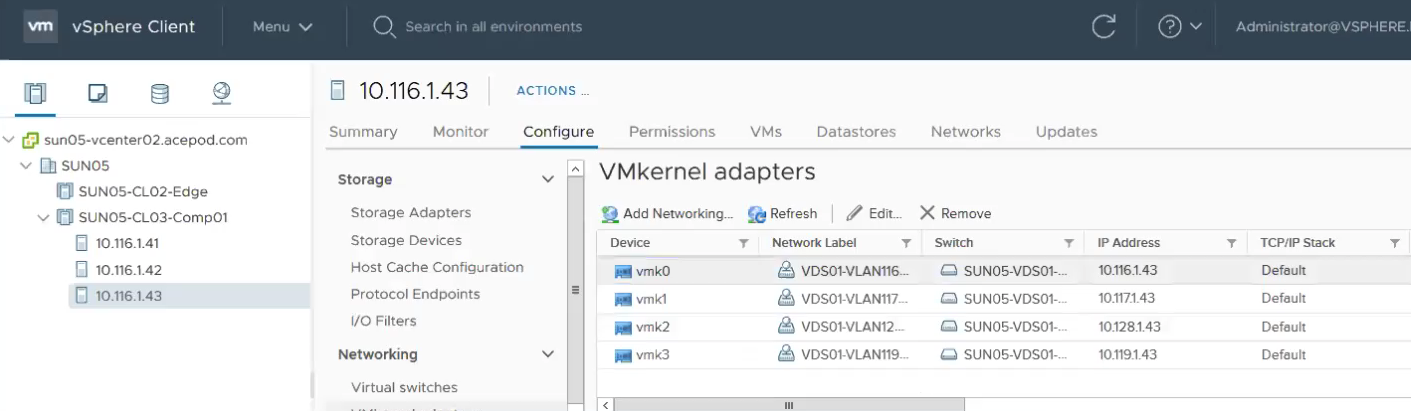
Next, adding all the rest VMkernels interfaces such as vMotion, IP Storage, vSAN, etc. using PowerCLI again.
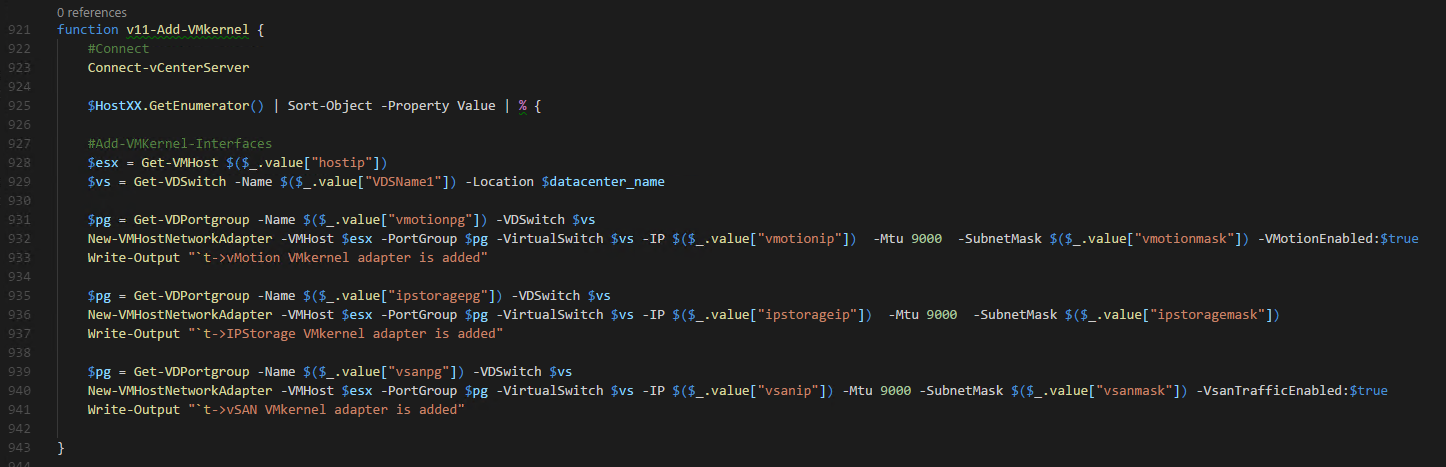
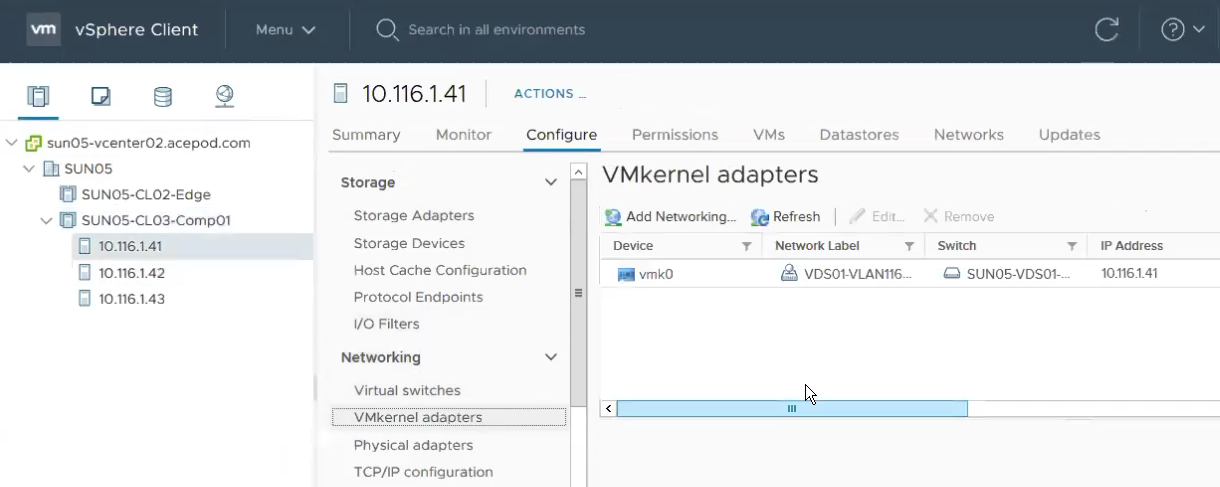
The following shows all the vmkernels were created successfully.
Lets try enabling Workload Management.
Workload Management Wizard does a good job in checking whether you have the relevant pre-reqs in order to have it enabled. You can see now we need NSX-T to be installed before proceeding further.

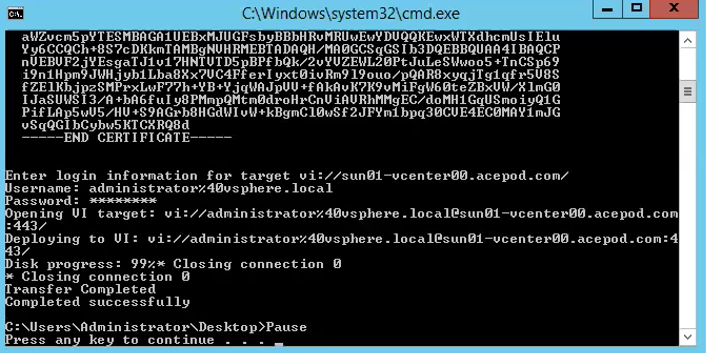
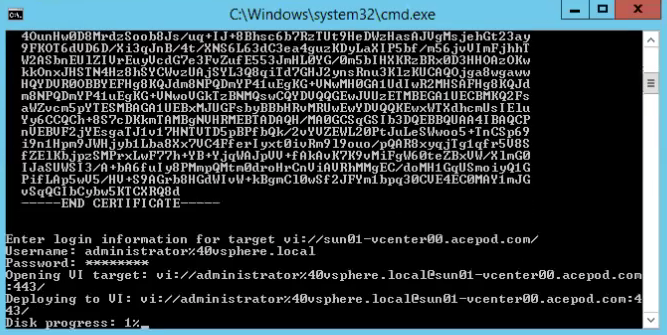
Step 4 – Install the NSX-T Manager. I also typically prefer to install NSX-T Manager using CLI and ovftool.
Install-nsxtmanager02.bat file :-
C:\Users\Administrator\Downloads\ovftool\win32\ovftool –name=sun05-nsxtmanager02 –X:injectOvfEnv –X:logFile=ovftool.log –allowExtraConfig –datastore=vsanDatastore –network=“VDS01-VLAN115-IaaS” –acceptAllEulas –noSSLVerify –diskMode=thin –prop:nsx_ip_0=10.115.1.26 –prop:nsx_netmask_0=255.255.255.0 –prop:nsx_gateway_0=10.115.1.1 –prop:nsx_dns1_0=192.168.1.10 –prop:nsx_domain_0=acepod.com –prop:nsx_ntp_0=192.168.1.10 –prop:nsx_isSSHEnabled=True –prop:nsx_allowSSHRootLogin=True –prop:nsx_passwd_0=VMware1!VMware1! –prop:nsx_cli_passwd_0=VMware1!VMware1! –prop:nsx_hostname=sun05-nsxtmanager02 “Z:\Downloads\VMware\vSphere\7.0-GA\nsx-unified-appliance-3.0.0.0.0.15946739.ova” vi://administrator@vsphere.local@sun01-vcenter00.acepod.com/?ip=192.168.1.202 Pause
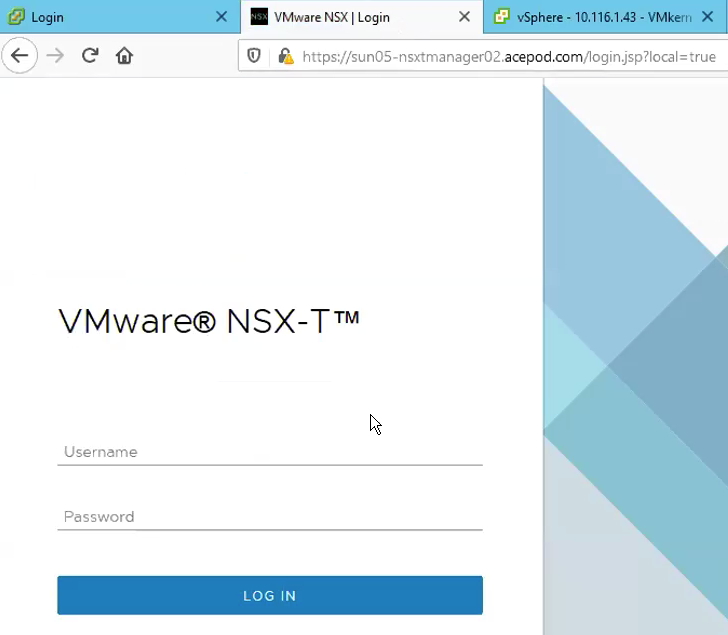
Once complete, we can try login to the UI of the NSX-T Manager.
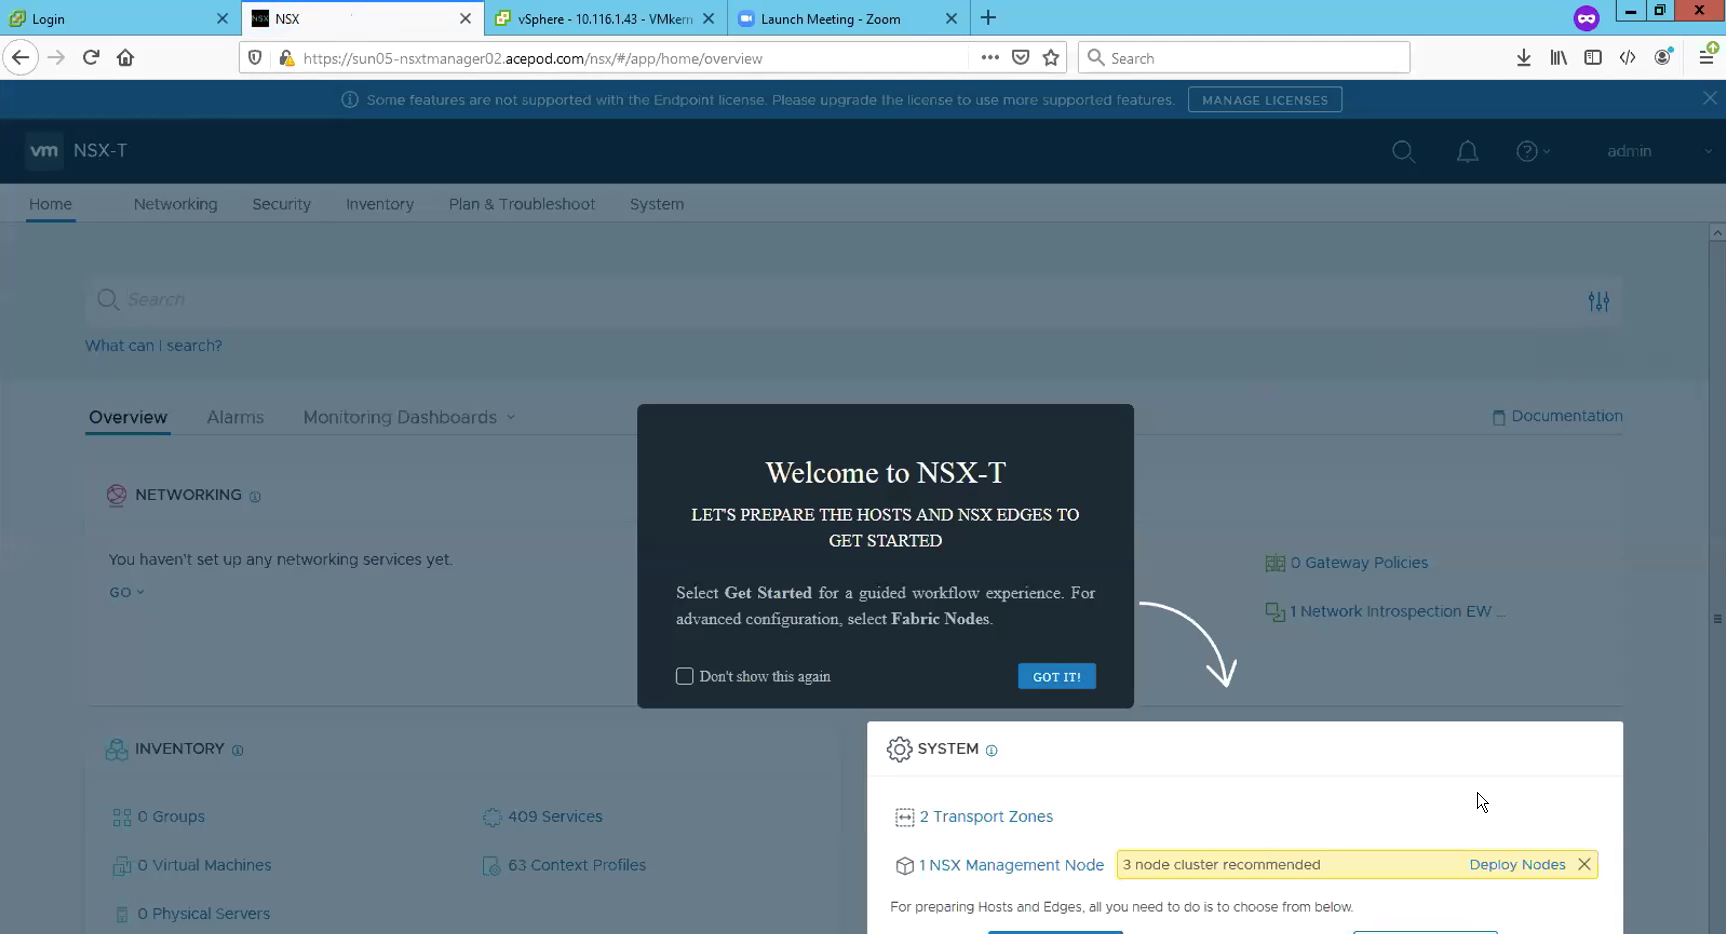
Once you see this page after login, this shows that the NSX-T Manager appliance was installed successfully.
Now we are done with installing and setup the vCenter and NSX-T Manager, next we will configure the virtual networking like NSX-T segments, Tier-0 routers, uplinks and network routing.
Tanzu vSphere 7 with Kubernetes on NSX-T 3.0 VDS Install
Part 1: Overview, Design, Network Topology, Hardware Used
Part 2: ESXi, vCenter, VDS Config and NSX-T Manager
Part 3: NSX-T Edges, Segments, Tier-0 Routing
Part 4: Supervisor Cluster, Content Library, TKG Clusters